How to Install WordPress on Localhost using XAMPP Easily
Do you want to install WordPress on localhost using XAMPP? Don’t worry, installing WordPress on localhost is quite easy and useful. This article will show you a complete step-by-step procedure on how to install WordPress locally using XAMPP.
For this purpose, we need just XAMPP software and WordPress files.
Before going to install WordPress on XAMPP. First, you need to know what is localhost and XAMPP exactly.
What is localhost?
In computer networking, localhost means ‘this computer. The computer you’re using now. When we say, we want to install WordPress on localhost. Then, this means that we want to install WordPress on our own local Computer.
This means, your website is hosted on your own pc or laptop. And not on the hosting server that lives somewhere else in the world.
There are many benefits to installing WordPress locally. For example, you can make WordPress websites on your local computer and test them before putting them live, you can test WordPress errors and optimize the website without damaging the real site.
As we use localhost for testing purposes. And for you, there are many hosting companies in the world that provide hosting for WordPress.
If you wish, you can check this complete guide on the best hosting companies for WordPress.
So, let’s go ahead.
What is XAMPP?
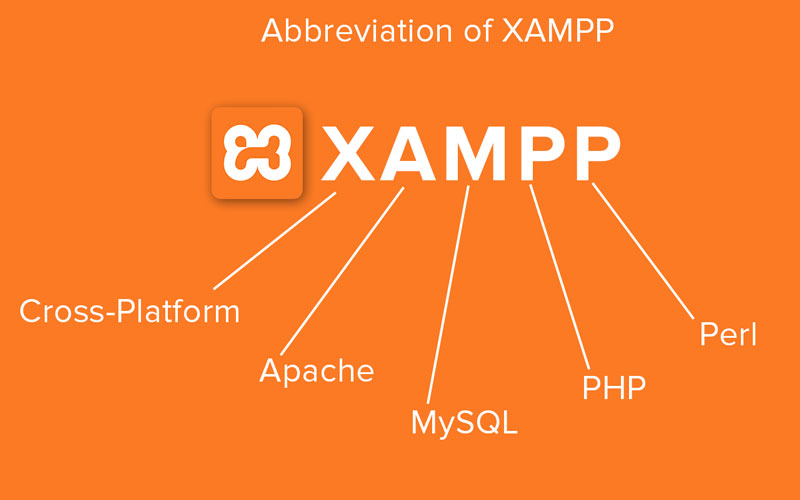
XAMPP is a free and open-source cross-platform web server solution. It was developed by Apache Friends. And XAMPP stands for cross-platform, Apache, MySQL, PHP, and Perl.
There are many benefits of using XAMPP. But the major benefit is that it runs on any system. Whether you’re using Windows or Mac or Linux. You can use XAMPP easily and for free. It’s time to learn, how to install WordPress in XAMPP.
Now, let’s see our main topic.
How to Install WordPress on Localhost Xampp
Step 1: Download and Install XAMPP on Your PC
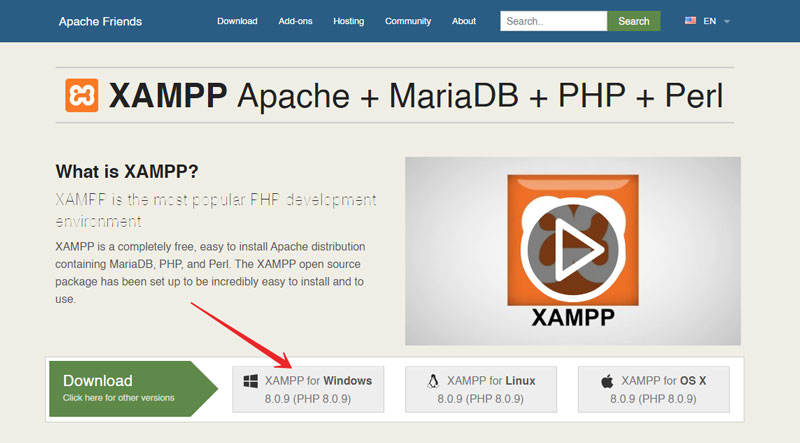
The first thing that you need to install WordPress on localhost is XAMPP. You need to download XAMPP from the Apachefriends.org website.
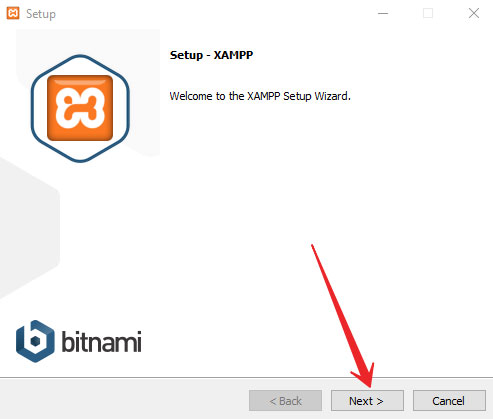
When downloading will finish. Then, go and open that XAMPP file to install XAMPP on your system. You may see a warning due to your antivirus just click on Yes to continue.
XAMPP installation for WordPress
When setup will run, click on the Next button.
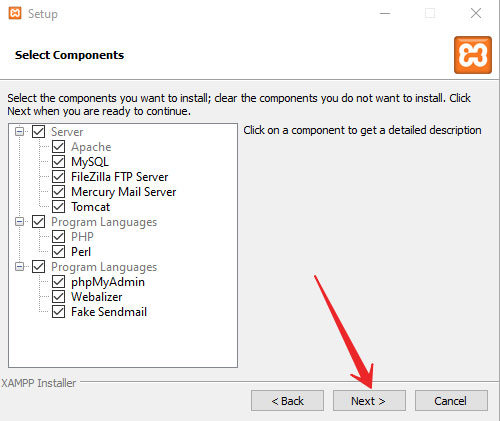
Now, if you see the image below. There are components that are checked to install. To install WordPress, we need only Apache, MySQL, and PHP. You can uncheck all except Apache, MySQL, and PHP or you can remain them checked.
By default, all the boxes are checked. I will remain them checked and click next. As in the image below.
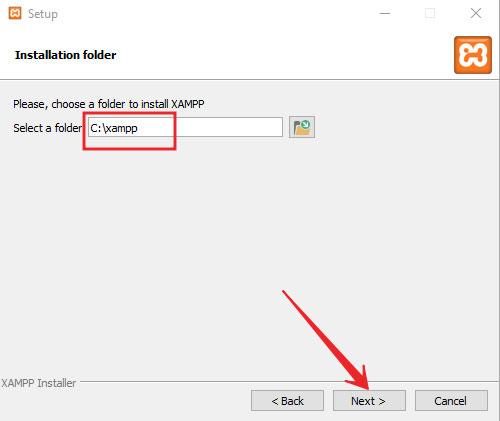
Now, by default, the location is the c drive where the XAMPP will install. I recommend you install XAMPP on the default location. So, don’t change the location and click on next. As shown in the image below.
In the next window, it will ask you to install Bitnami. But we don’t need that. So, don’t check that and click on next to continue.
Again click on Next. Then, the installation of XAMPP will start. After completion of the installation. We need to open the XAMMP folder to run XAMMP software.
After running the XAMPP software, we will go and install WordPress on localhost.
Run XAMPP on your PC
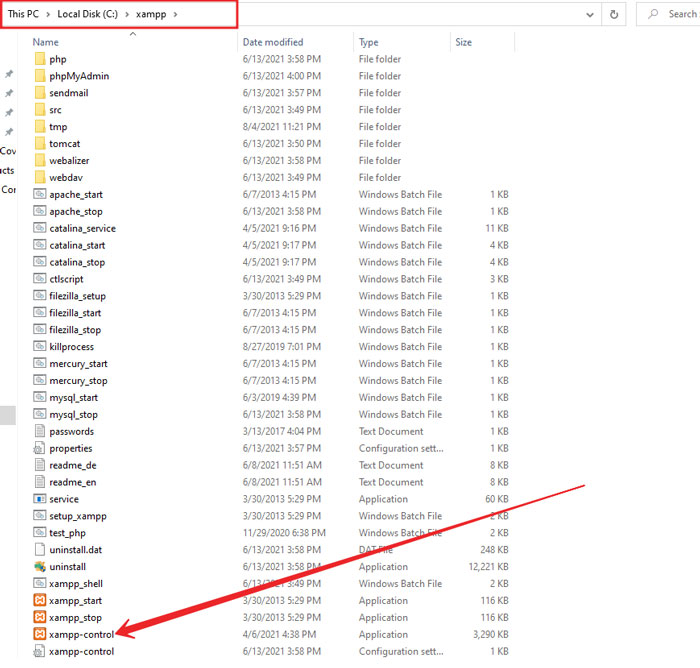
To do this, go to the folder where XAMPP is installed.
To run XAMPP, scroll down to the end, and click on the XAMMP control panel as shown in the image below to run XAMPP on your pc.
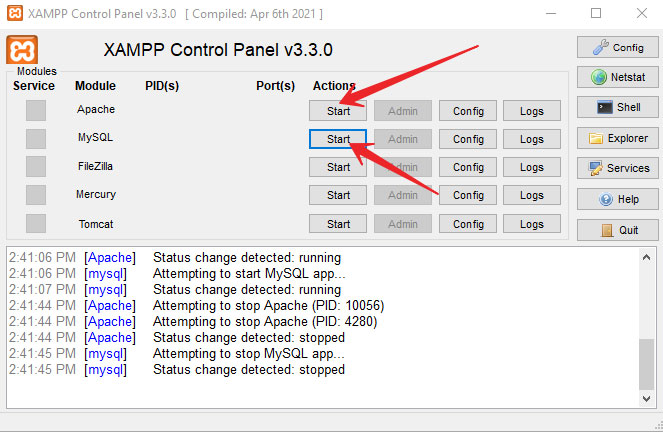
After running the software, the interface will look like this below.
Run Apache and MySQL servers to install WordPress
Just click on the start button next to Apache and MySQL to run them.
When the Apache server and MySQL database server will run. Then, it will look like this below.
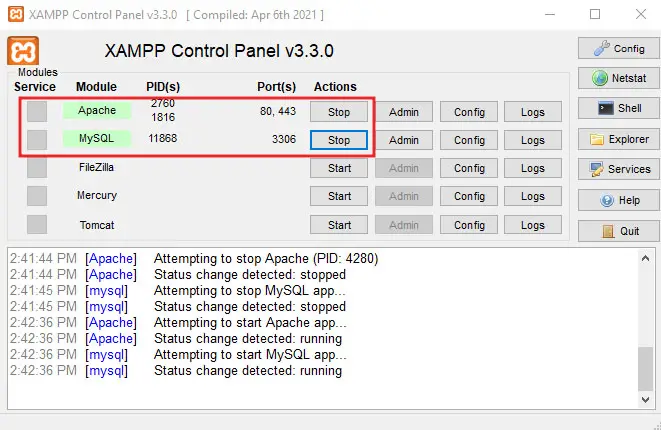
Now, the Apache server with PHP and MySQL database server is running. Now, the local host is ready and now we can install WordPress on it.
Step 2: Download and Extract the Latest Version of WordPress from the internet
To do this, you have to go to the WordPress.org website to Download WordPress. Open the link, scroll down the page, and click on the download WordPress button as shown in the image below.
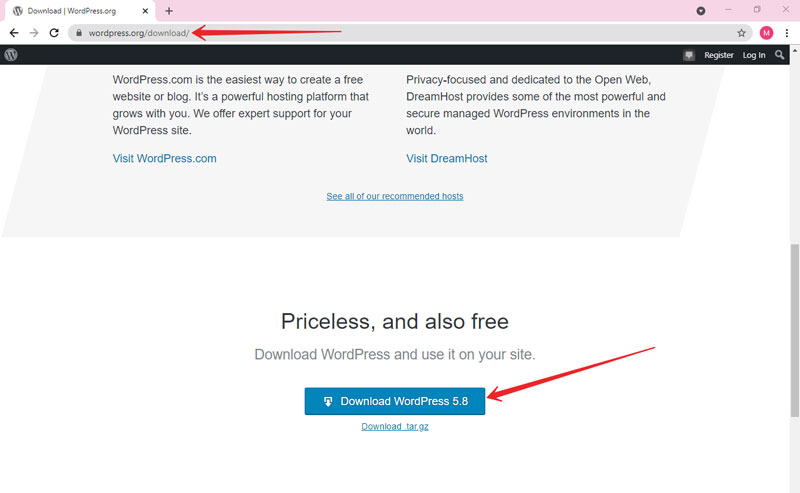
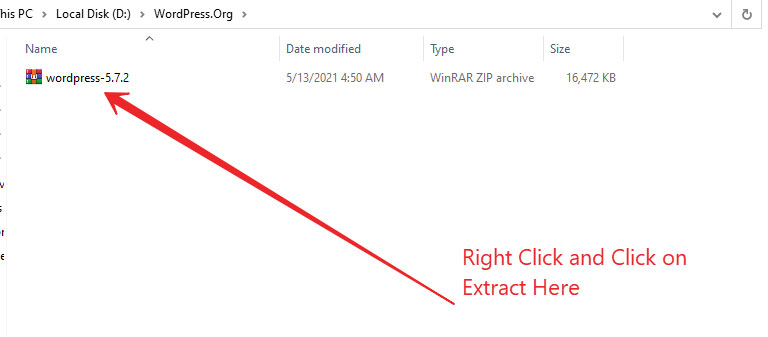
After the downloading will complete, WordPress will be in a zip file. So go and extract it on your pc.
Step 3: Create a Folder in XAMPP htdocs Folder To Place WordPress Files
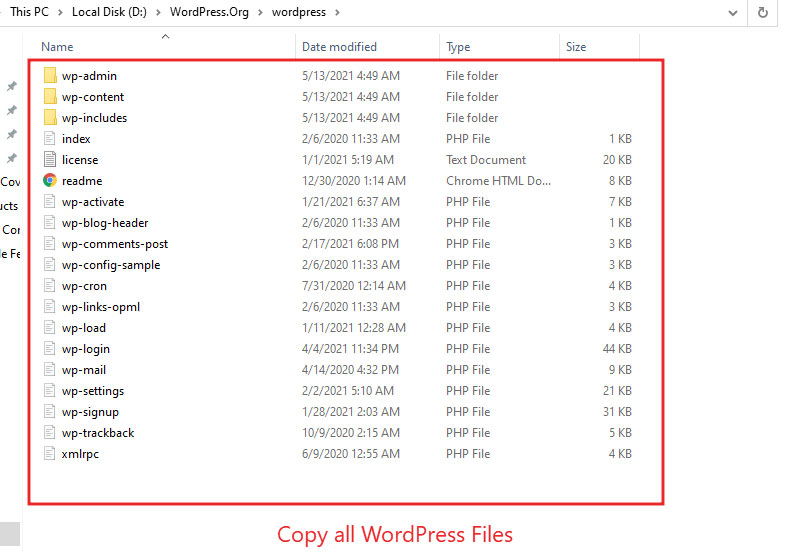
After extracting, open the WordPress folder. And copy all the WordPress files.
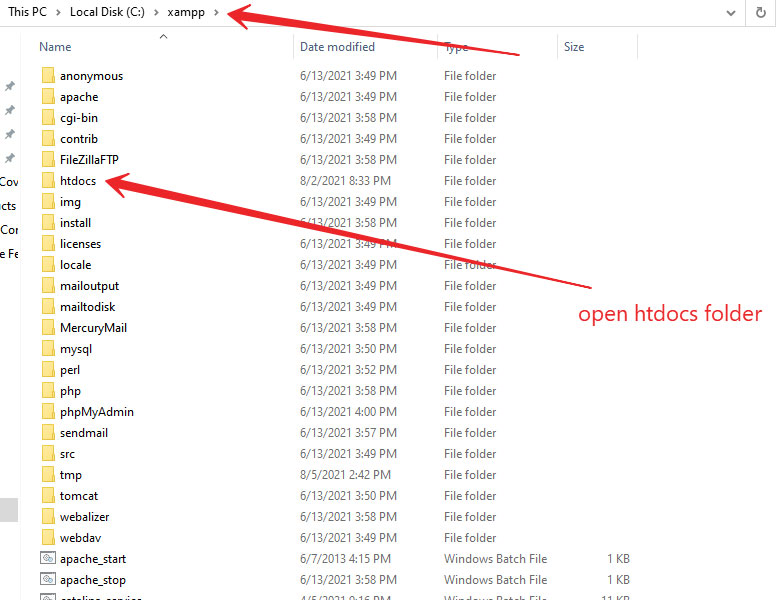
Now, go to the XAMPP folder then find htdocs folder then open that folder.
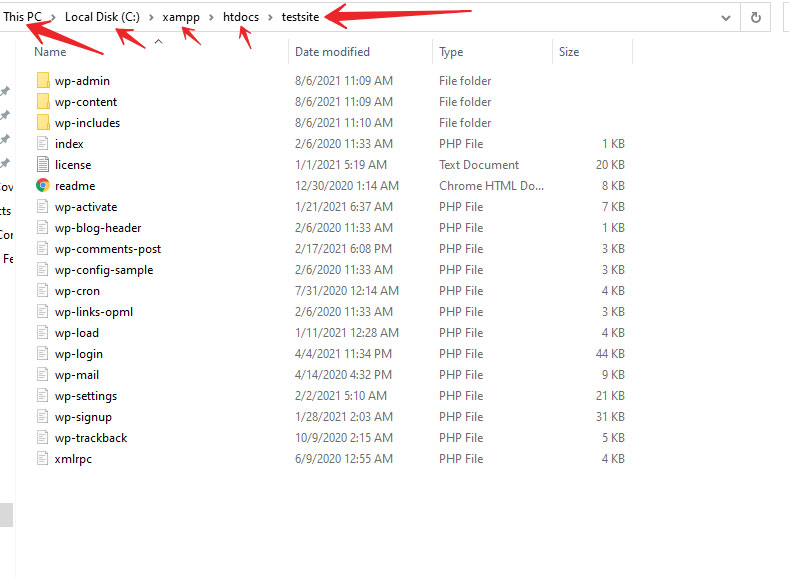
Create a new folder with any name that you want to use as your website name in that folder. After that open that folder and paste all the WordPress files that you have copied already.
In my case, I created a folder with the name test site. And then paste all WordPress files into that. As you can see in the image below.
Now, we have placed WordPress files on the local XAMPP server. It’s time to access WordPress in our browser for installation and configuration.
To do this, open your browser.
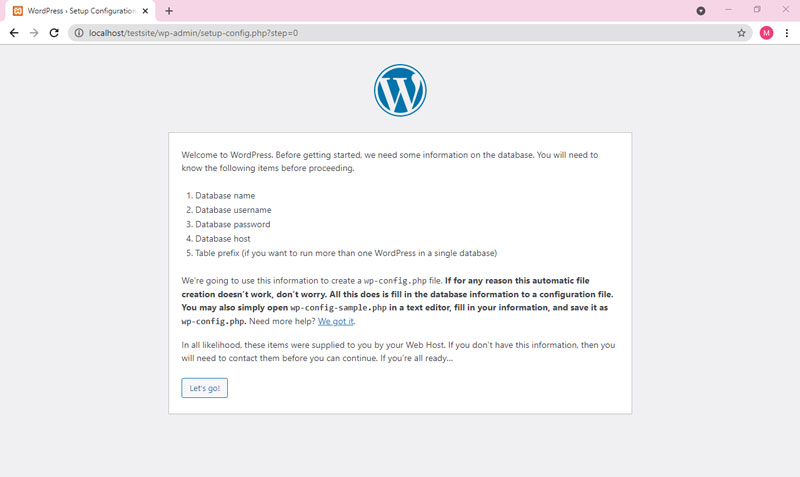
And type localhost/testsite. After typing that in your browser, it will take you to the WordPress configuration page. Just select the language and click on the continue button. As shown in the image below.
Step 4: Access WordPress files in Your Browser
Note: localhost means this computer and test site is the folder that we have been created already.

Just make sure Apache and MySQL are running on XAMPP otherwise this above page will show an error. Now, let’s go ahead. Click the continue button as shown above.
After clicking on the continue button.
Now, to install WordPress with XAMPP on localhost, we need a database.
Step 5: Create a Database to install WordPress on localhost
As you can see in the above image, it is asking for
- Database name
- Username
- Password
- Database host
- Table Prefix
Now, we need to create a database where all the WordPress data will store. And there, we will get these details. And then we will enter that in the WordPress Configuration page to complete the installation of WordPress.
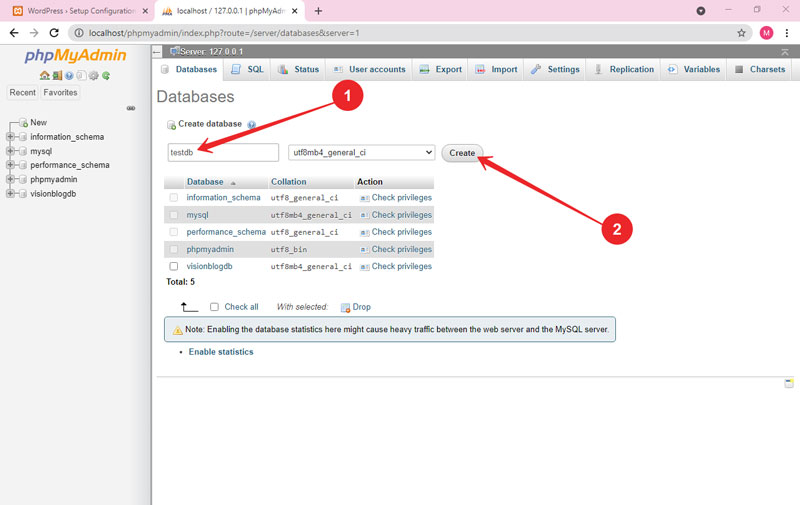
Now, open a new tab in your browser and type localhost/PHPMyAdmin. This will take us to the place where we will create a new database.
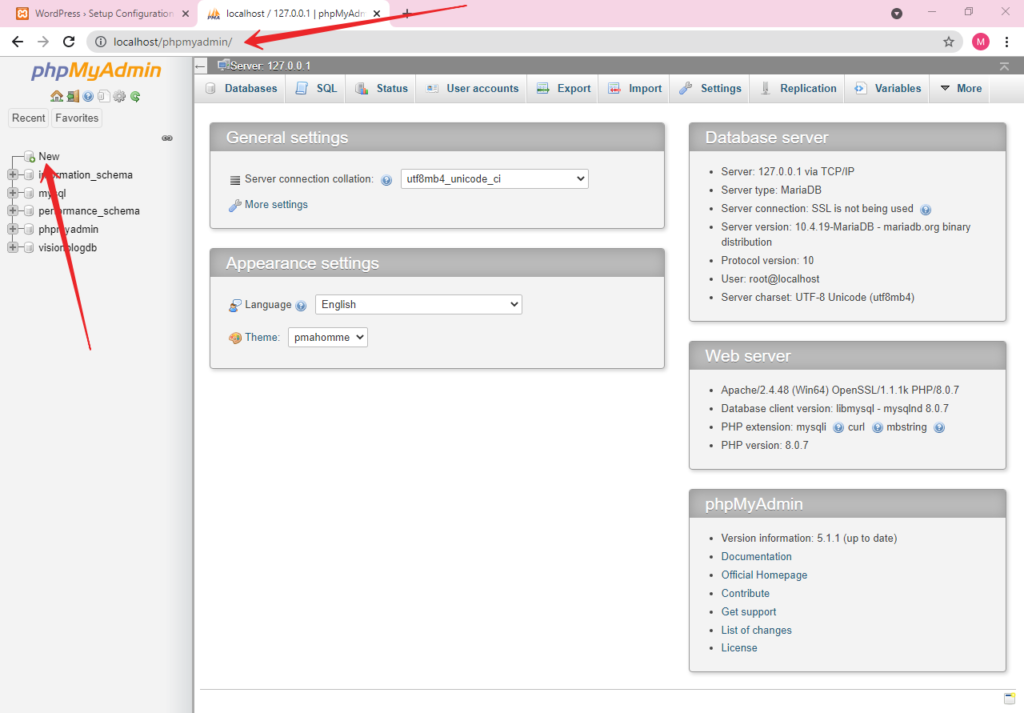
Now, click on New to create a new database as shown in the image above. After that, type a name for your database. Let’s say testdb then click on create.
Now, the database has been created. Go to the Privileges section and create a username and password for this database and assign the privileges to the user. As shown in the image below.
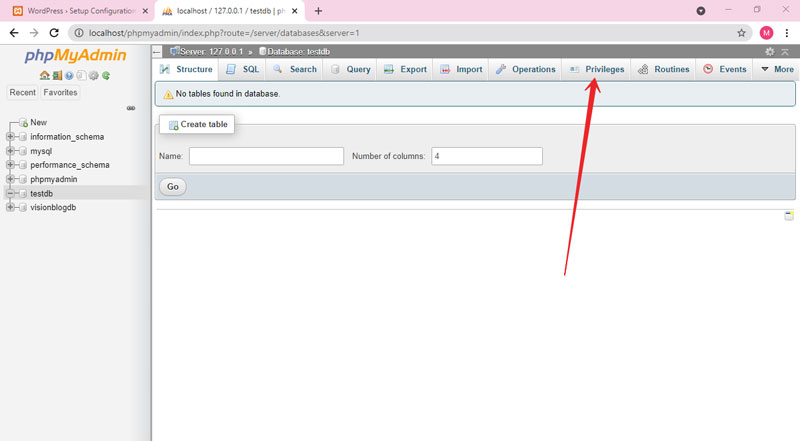
Here click on the add user account.

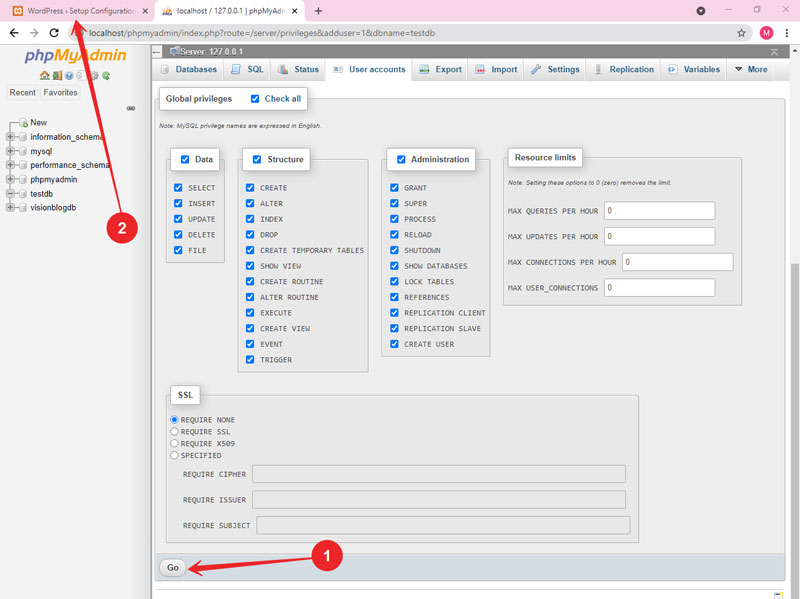
Now, create a username, type ‘localhost’ as the hostname then create a password and retype it. After that check on Global privileges to assign all privileges to the user.

Keep remembering the database name, username, password, and hostname. Because we will need that.
Then, scroll down and click on the Go button. As shown below in the image.
Tip: You can see more about creating databases in our how-to-create a MySQL database tutorial.
Let’s see the next step.
Step 6: Configure and Install WordPress
After that go to the WordPress setup configuration page and click on the let’s go button. As shown below.
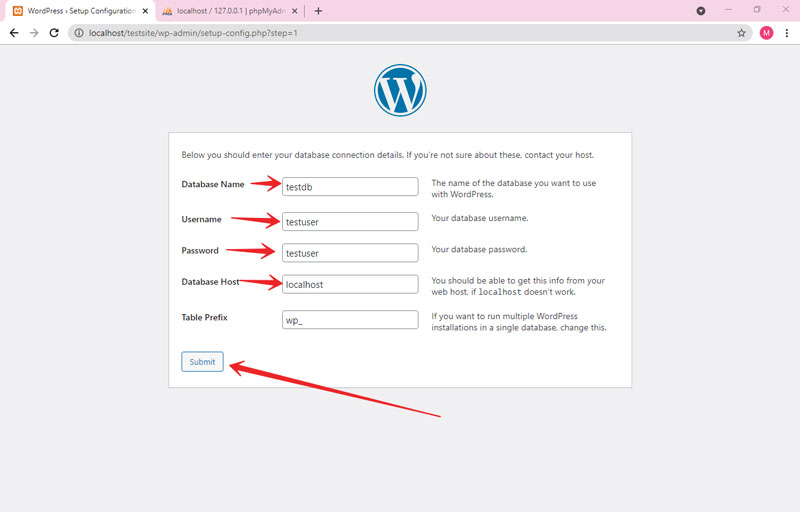
Now, enter the database name, username, password, and hostname. Then click on submit button.
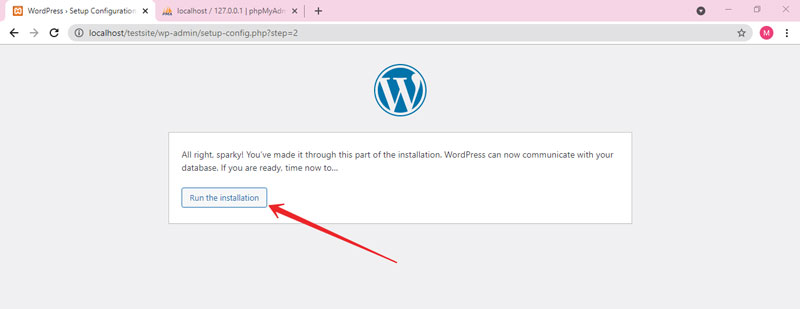
Click on Run the Installation.
Here you go. You will enter your new website details here. Site title, username, password, and correct email then click on Install WordPress.
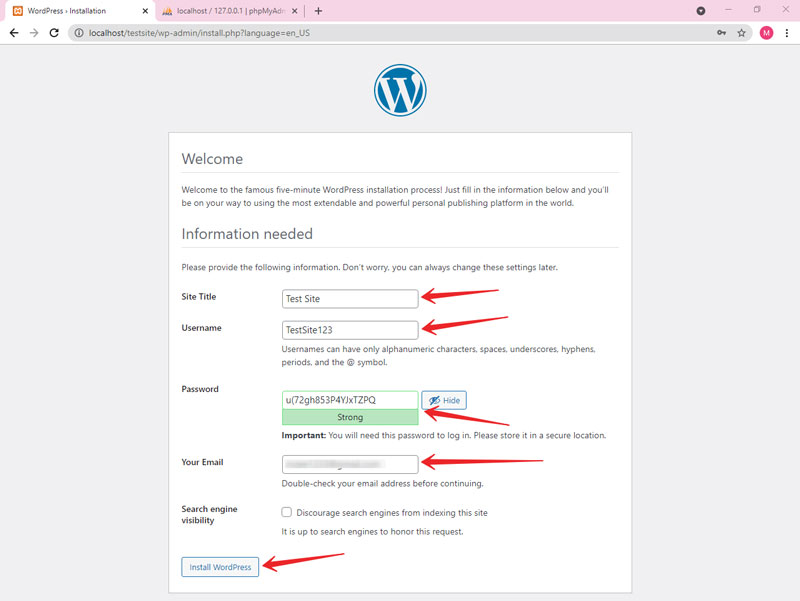
Remember your username and password because you will need that to log in to the WordPress website.
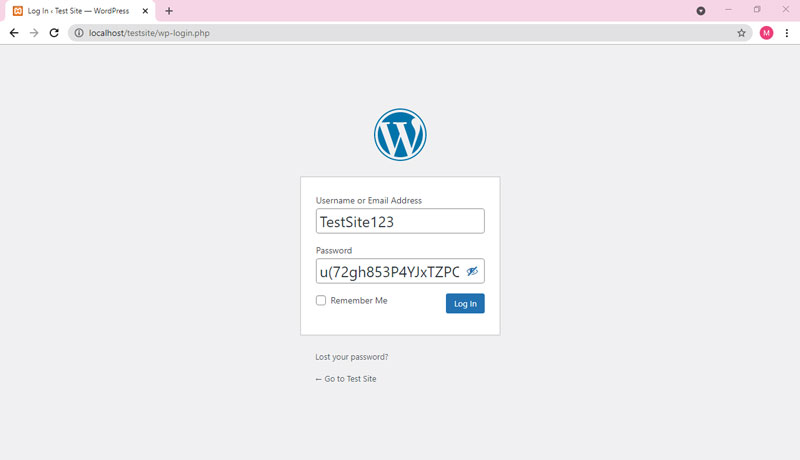
WordPress will install in a minute. After that click on the login button.

Enter your login details and click login.
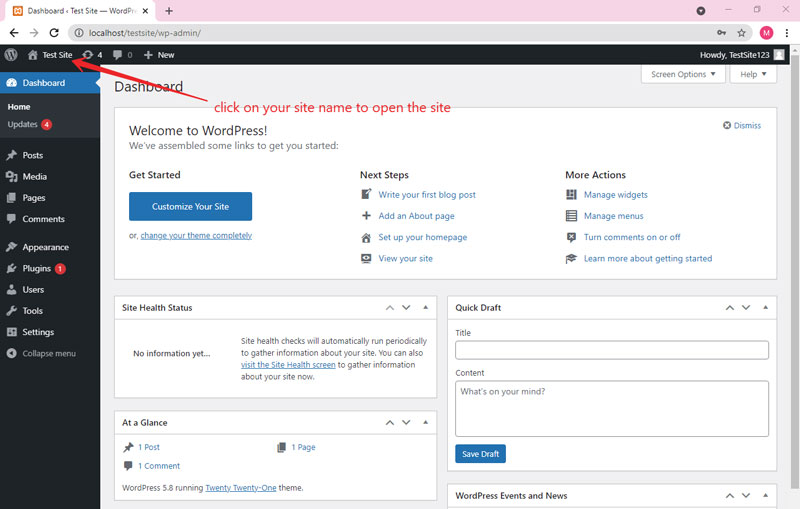
After clicking on login, it will take you to the WordPress dashboard.
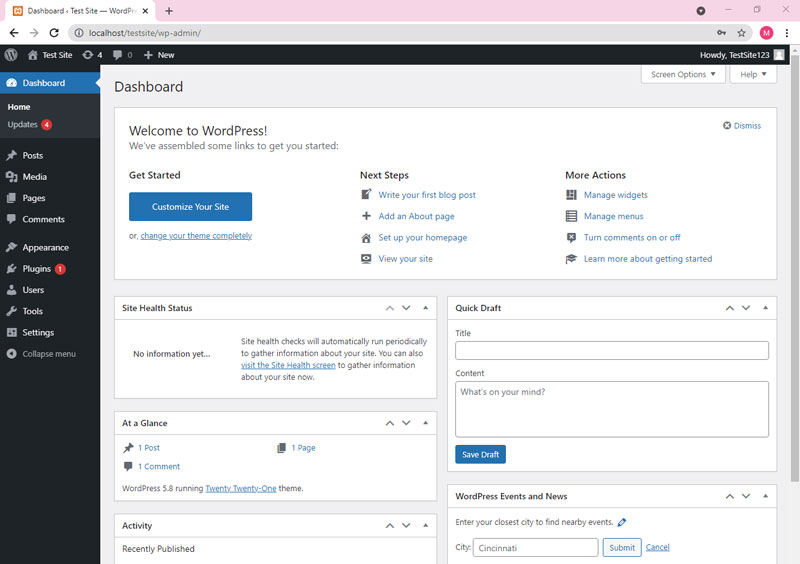
Congratulations! We have installed WordPress on localhost.
At the WordPress site, click on your site name to go to the site. In my case, I created this site with the Test Site name. So, I click on that. As shown in the image below.
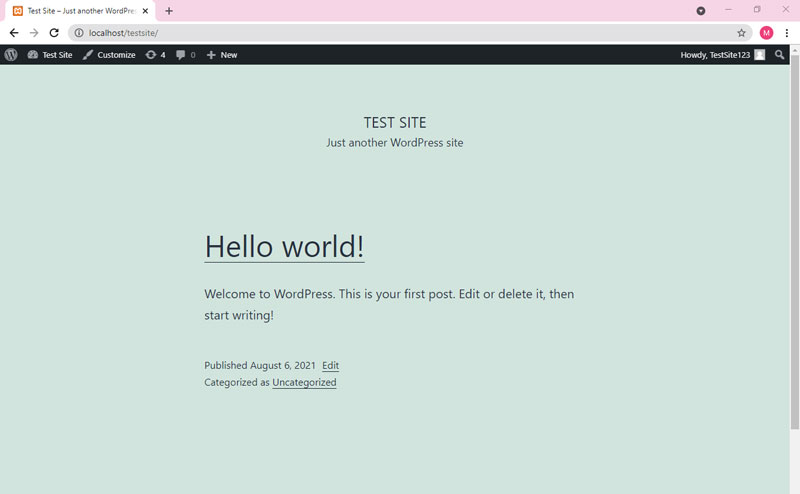
By default, WordPress is using the 2021 theme.
All Done! Congratulations you have installed WordPress on localhost with XAMPP.
Now we have successfully installed WordPress on localhost. Now, you can customize your website as you want. Just remember these two points below.
- Whenever you want to access your website again on localhost. Just run XAMPP and open your browser then type localhost/yoursitename.
- And if you want to log in to your WordPress dashboard. Then, type localhost/yoursitename/wp-admin in your browser address bar.
That’s it. This is how you can install WordPress with XAMPP on localhost.
I hope this step-by-step guide will be helpful for you. If you have any questions related to this topic then feel free to ask that in the comment section below.
