What are the 10 Basic HTML tags? How to use them?
Today’s topic is basic HTML Tags. And how to use them to make the basic structure of a webpage? So, in this lesson, we will learn a few important HTML tags. These are the tags that we use again and again in our HTML documents.
These 10 tags are the most basic HTML tags. These are essential for any HTML document.
So, let’s go ahead and see what are those tags and what are their importance.
First and foremost, always remember that every HTML element is enclosed by an open tag and a closing tag. And the content goes inside them. Let’s see the image to understand.
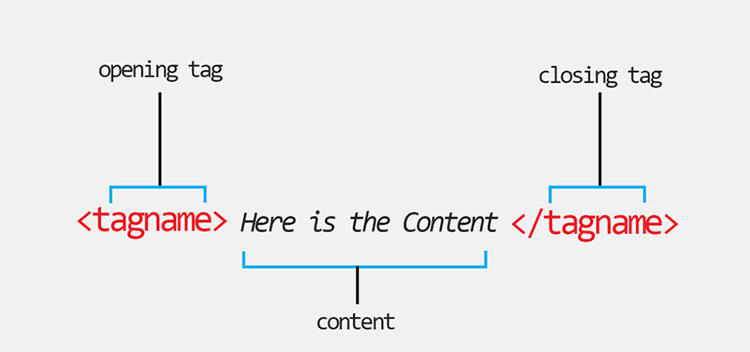
Hope you have understood the opening and closing tags. Let’s go ahead and see the basic tags of HTML.
Tip: Are you new to HTML? Start from here: What is HTML?
Basic HTML Tags
1- <!DOCTYPE html>
First of all, the HTML document starts with document type declaration ( !DOCTYPE ) like this syntax:
<!DOCTYPE html>
Always remember this code snippet. This code is essential because this tells the browser what is the version of HTML. And we will always add this at the top of all the HTML documents. For all the HTML documents that you will create, the above code should be at the top.
Note: !DOCTYPE tells the browsers that this HTML code version is HTML5. So We are learning HTML5. Now HTML5 is the latest version that we are using now. Our browsers display HTML5 webpages.
2- <html> tag
This tag is the most basic HTML tag. Without this tag, our HTML code will not work correctly. All HTML documents will begin with <html> open tag and end with </html> close tag.
Let’s see the code example below.
<!DOCTYPE html>
<html>

</html>
3- <head> tag
Thirdly, you will add a head tag which will also always use after the HTML tag when you start your HTML document. As given below:
<!DOCTYPE html>
<html>
 <head>

 </head>

</html>
4- <title> tag – Title Tag
Now, in the head tag, we use the title tag. Similar to the other three tags, this will always use in between head tags. And in the title tag, we write our webpage title.
<!DOCTYPE html>
<html>
 <head>
   <title> my webpage  </title>
 </head>

</html>
5- <body> tag
Then, after the head and title tag, we use our most basic tag the body tag. In this tag, we write all our content. So, the body tag uses to display all webpage content. There is only one body tag in HTML.
<!DOCTYPE html>
<html>
 <head>
   <title> my webpage  </title>
 </head>
<body>

</body>
</html>
6- heading tags (h1 to h6)
Now we will use heading tags. There are six types of headings.
h1 is the biggest heading
h3 is smaller than h2
h4 is smaller than h3
h5 is smaller than h5
h6 is the smallest heading
<!DOCTYPE html>
<html>
    <head>
       <title> my webpage  </title>
    </head>
<body>
     <h1> heading 1 </h1>
     <h2> heading 2 </h2>
     <h3> heading 3 </h3>
     <h4> heading 4 </h4>
     <h5> heading 5 </h5>
     <h6> heading 6 </h6>
</body>
</html>
7- <p> Tag – To Add paragraphs
Now, we will use a p tag mean a paragraph tag, p tag uses to write paragraphs in an HTML webpage.
<!DOCTYPE html>
<html>
    <head>  <title> my webpage  </title>   </head>
<body>
     <h1> heading 1 </h1>
     <h2> heading 2 </h2>
     <h3> heading 3 </h3>
     <h4> heading 4 </h4>
     <h5> heading 5 </h5>
     <h6> heading 6 </h6>
     <p> this is a paragraph tag </p>
</body>
</html>
8- <a> Tag – for HTML Hyperlinks
Furthermore, tags are used for adding links in HTML. We use href attribute in an open tag and give that attribute a site URL.
<a href="https://www.twitter.com"> Twitter </a>
9- <img> Tag – To Add Images
So this tag is used for adding images to a webpage. This tag has no closing tag. In <img> tag, we give it an src attribute and give it a value of image file location.
<img src="images/filename.jpg>
10- <br> Tag – Line Break
At last, this is a line break tag. We use this tag to break a line. And this tag has no closing tag.
<br>
Conclusion
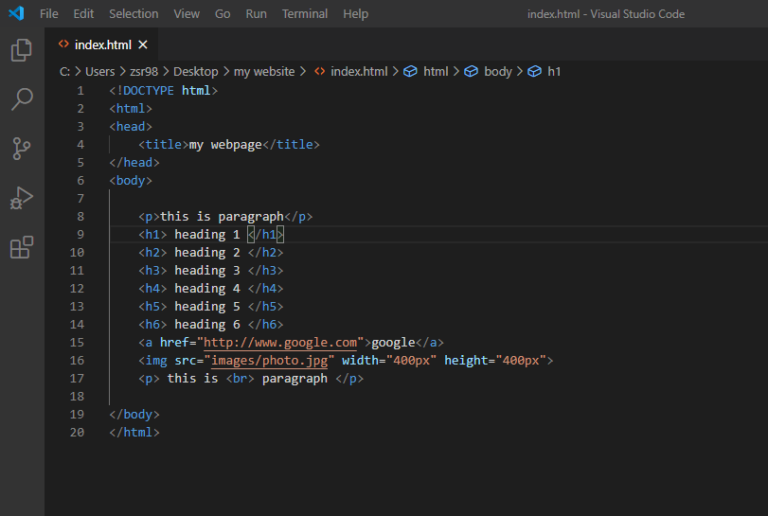
So, I am going to show an image of our today’s work:
Our Source file:
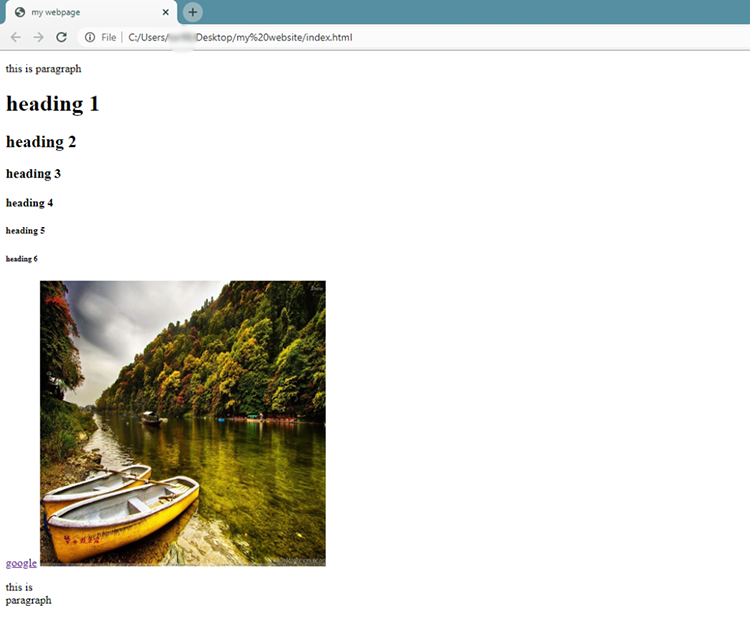
Output in browser:
So, Keep practicing HTML tags.
