How to Display MySQL Table Data from Database using PHP

This tutorial will teach you, how to display MySQL table data from a MySQL database using PHP on a webpage.
If you have any type of HTML form that stores entries in the MySQL database. And now you’re wondering how to display that data from MySQL database tables in HTML using PHP then this guide is purely for you.
In the previous tutorial, we learned all about how to connect HTML Form to MySQL database using PHP. And we saw the methods to store form entries in the MySQL database. This tutorial is the next step that will teach you to retrieve data from the database using PHP.
After reading this guide, you’ll be able to show the content of a MySQL Table from the Database.
The first and most important question is, what do you need for this?
So, let’s see the simple requirements for this tutorial.
- You need a Text Editor (I’ll use Visual Studio Code).
- And a Server, in this guide we’ll use a localhost server like XAMPP. Note: You can also use live-server the steps are the same.
- Also, you already have a MySQL Database created. (If you don’t have, you can see this tutorial on how to create a MySQL Database using phpMyAdmin).
- You should have some knowledge about connecting HTML Form to the MySQL database that properly stores entries in the database. But don’t worry, if you don’t, you can see our previous tutorial on How to Connect HTML Form to MySQL Database. After reading that tutorial, you can start from here.
Now, let’s see how to show MySQL table data from the database in PHP.
How to Display MySQL Table Data using PHP
Displaying data from the MySQL database is a lot easier and more straightforward process. Let’s begin with, our first step.
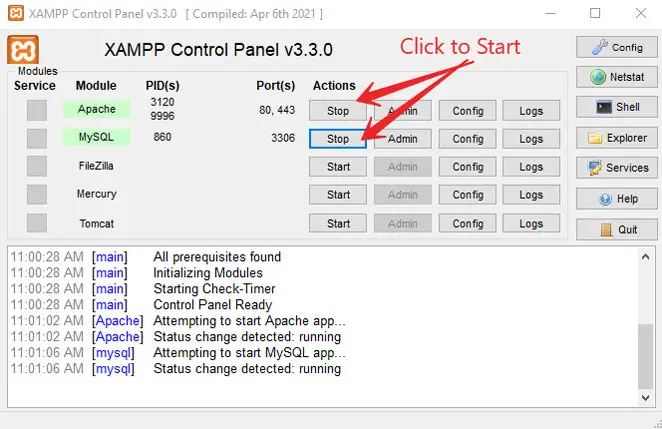
Step 1: Run Apache and MySQL Server on XAMPP
Before going to start the process, if you’re using localhost XAMPP then make sure Apache and MySQL services are running on your PC. Otherwise, PHP will not run, because it’s a server-side scripting language.
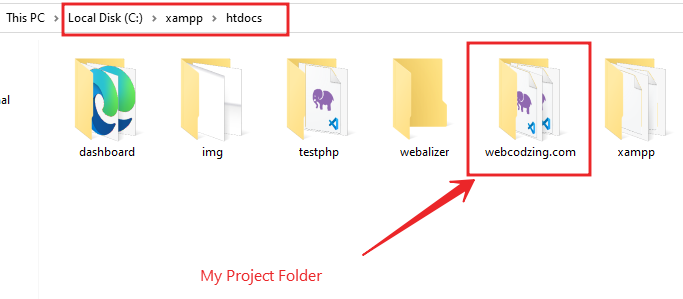
Note: Your project folder must be placed inside the ‘htdocs‘ folder that is located in the XAMPP folder as shown below.
Then, see the next step.
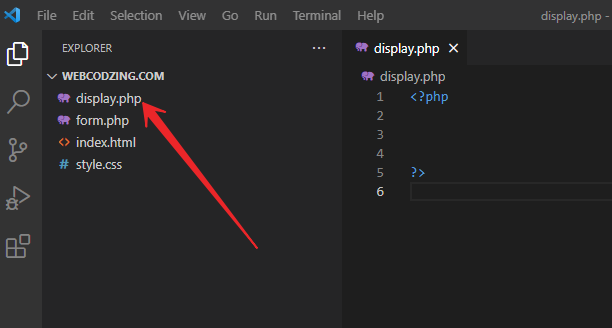
Step 2: Create a display.php file to Display MySQL Table
First of all, you need to create a display.php file that we will use to display MySQL table Data. All the code to display data from the MySQL database will be in this file.
To create a display.php file, simply go to your text editor and create a new file display.php as shown in the image below.
Tip: If you’re a beginner and don’t know to run PHP code, then check this tutorial to learn How to Run PHP Code on your PC.
Let’s see the next step.
Step 3: Create a Connection to MySQL Database
In this step, you’ll create a connection to your MySQL database to show data from the database. To do this, you should already have a MySQL Database created with a user assigned all privileges.
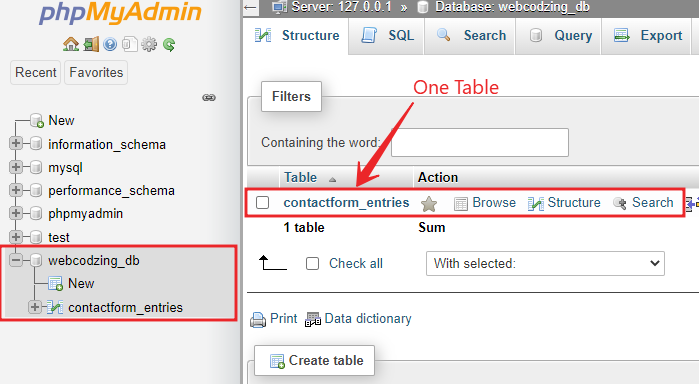
In this case, we already have a MySQL database with the name webcodzing_db. And we have a table in our MySQL database with the name contactform_entries as you can see below.
Note: If you don’t have a database, you can check this guide to create a MySQL database using PHP code.
For this database, we have a user assigned all privileges.
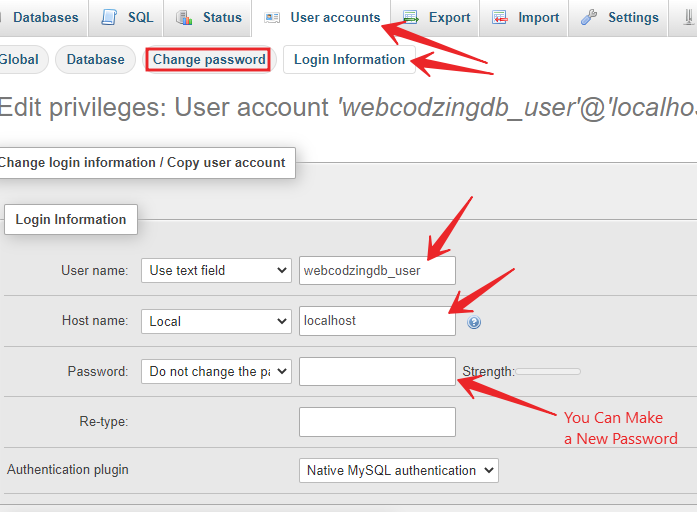
The details of our hostname, database user, and database that we need are the following.
- Hostname: localhost
- Username: webcodzingdb_user
- Password: webcodzing123
- Database Name: webcodzing_db
We’ll use these above details to create a connection to our MySQL database. Whether you’re using localhost or a live host, you can find and change these details in the User accounts > Login information section of phpMyAdmin as shown below.
Now, go to display.php and write this code below, or just copy-paste.
→ display.php
<?php

//storing database details in variables.
    $hostname = "localhost";
    $username = "webcodzingdb_user";
    $password = "webcodzing123";
    $dbname = "webcodzing_db";

    //creating connection to database
    $con = mysqli_connect($hostname, $username, $password, $dbname);
    //checking if connection is working or not
    if(!$con)
    {
        die("Connection failed!" . mysqli_connect_error());
    }
    else
    {
        echo "Successfully Connected! <br>";
    }
?>
Code Explanation:
- The code is pretty simple. If you see the above code from lines no. 4 to 7, we created 4 variables $hostname, $username, $password, and $dbname to store our MySQL database details in it.
- Then, we used the mysqli_connect() function and gave it database details as parameters to create a connection.
- After that, we checked the connection with the if() and else statement. Inside the if() statement, we used die() function. To see if the database is connected or not.
Note: Database details must be correct and do not have any spelling mistakes.
After saving the code, when you’ll refresh the display.php page ‘Successfully Connected’ message will show.
Let’s see the next step.
Step 4: Command to SELECT MySQL Table Data from the Database
For this, you must have some columns with entries or rows in your table. As you know, in databases the data is stored in the form of columns and rows.
For this purpose, we already have some entries stored in our contactform_entries table. In the contactform_entries table, we have 6 entries stored in the 4 columns (id, name_fld, email_fld, msg_fld) as shown in the image below.
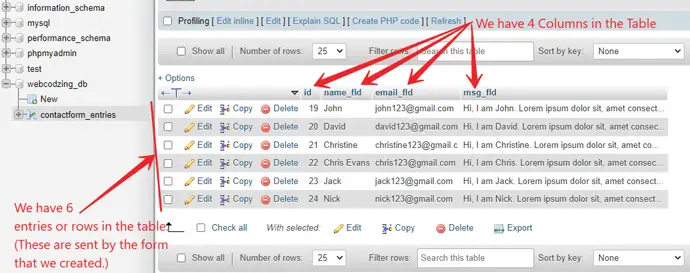
To collect these entries we have a contact form that we created in our previous tutorial. And these are records that we’re going to display from MySQL database to HTML page using PHP script.
Now, we’re going to use the following SQL command to select all the records from the MySQL table ‘contactform_entries‘.
→ SQL Query
SELECT * FROM table_name;
Let’s see the complete code.
→ display.php
<?php

//storing database details in variables.
    $hostname = "localhost";
    $username = "webcodzingdb_user";
    $password = "webcodzing123";
    $dbname = "webcodzing_db";

    //creating connection to database
    $con = mysqli_connect($hostname, $username, $password, $dbname);
    //checking if connection is working or not
    if(!$con)
    {
        die("Connection failed!" . mysqli_connect_error());
    }
    else
    {
        echo "Successfully Connected! <br>";
    }
    //Output Form Entries from the Database
    $sql = "SELECT * FROM contactform_entries";
    //fire query
    $result = mysqli_query($con, $sql);

?>
Code Explanation:
- Just see line no. 20 to 23. I created a variable $sql and type the SQL query. “
SELECT * FROM contactform_entries” in the string. The query is selecting all the columns in the contactform_entries table. - Then, I created another variable $result to fire the query with the mysqli_query() function. In this function, I used $con and $sql variables as parameters. After the execution of these queries, the result will store in the $result variable.
Now, we have selected MySQL table records. It’s time to print MySQL table data from the database. Let’s see the next step.
Step 5: Fetch and Display MySQL Table Data
To print the MySQL table data, first, you need to check if there are any rows in your table. To do this, we’ll use an if() statement with mysqli_num_rows() function.
→ php code
if(mysqli_num_rows($result) > 0)
{
  $row = mysqli_fetch_assoc($result);
  echo "id: " . $row["id"]. " - Name: " .
    $row["name_fld"]. " Email: ". $row["email_fld"]. " Message: ".
    $row["msg_fld"] . "<br>";
}
else
{
  echo "0 results";
}
Code Explanation:
- The above code consists of the if() else statement, for checking if there is any record or the table is empty. If the table will empty then it will execute the else statement which will show 0 results.
- Inside the if() statement, we used a function called mysqli_fetch_assoc(); This function fetches table rows in the form of an associative array.
- Then, I used an echo statement to display the values of an associative array. Inside the echo statement, I’m using the $row variable because the mysqli_fectch_assoc() function is storing the values inside it.
- Inside square brackets, I’m using the name of each column and combining it with a string using the dot ( . ) operator.
Related: 6 Methods to Print Array in PHP.
But the problem here is that it will fetch only one record. And you will have to repeat the code to display more records. Like this below.
→ php code
<?php
if(mysqli_num_rows($result) > 0)
{
  // first record
  $row = mysqli_fetch_assoc($result);
  echo "id: ". $row["id"]. " - Name: ".
    $row["name_fld"]. " Email: ". $row["email_fld"]. " Message: ".
    $row["msg_fld"] . "<br>";
    $row = mysqli_fetch_assoc($result);
  // second record
  echo "id: ". $row["id"]. " - Name: ".
    $row["name_fld"]. " Email: ". $row["email_fld"]. " Message: ".
    $row["msg_fld"] . "<br>";
    $row = mysqli_fetch_assoc($result);
  //third record
  echo "id: ". $row["id"]. " - Name: ".
    $row["name_fld"]. " Email: ". $row["email_fld"]. " Message: ".
    $row["msg_fld"] . "<br>";
}
else
{
  echo "0 results";
}
?>
This is helpful in some cases but what if you want to display thousands of records from the MySQL database using PHP? The simple answer is to use a while () loop.
A simple one-line of code can reduce your efforts. So, let’s use the while() loop.
→ php code
<?php
if(mysqli_num_rows($result) > 0)
{
 while($row = mysqli_fetch_assoc($result)){
   echo "id: " . $row["id"]. " - Name: " . $row["name_fld"]. " Email: ". $row["email_fld"]. " Message: ". $row["msg_fld"] . "<br>";
}
}
else
{
  echo "0 results";
}
?>
The loop will run until all records will display in PHP from the database.
See the complete code to ‘display MySQL Table Data from the Database using PHP’:
→ complete ➡ display.php
<?php

//storing database details in variables.
    $hostname = "localhost";
    $username = "webcodzingdb_user";
    $password = "webcodzing123";
    $dbname = "webcodzing_db";

    //creating connection to database
    $con = mysqli_connect($hostname, $username, $password, $dbname);
    //checking if connection is working or not
    if(!$con)
    {
        die("Connection failed!" . mysqli_connect_error());
    }
    else
    {
        echo "Successfully Connected! <br>";
    }
    //Output Form Entries from the Database
    $sql = "SELECT id, name_fld, email_fld, msg_fld FROM contactform_entries";
    //fire query
    $result = mysqli_query($con, $sql);
    if(mysqli_num_rows($result) > 0)
    {
       while($row = mysqli_fetch_assoc($result)){
           echo "id: " . $row["id"]. " - Name: " . $row["name_fld"]. " Email: ". $row["email_fld"]. " Message: ". $row["msg_fld"] . "<br>";
       }
    }
    else
    {
        echo "0 results";
    }
    // closing connection
    mysqli_close($con);

?>
You can copy and paste all the above code into your display.php file.
Sometimes, we want to show all the database records in a table format. You can do it with just a few simple HTML tags. So, let’s see
How to Fetch Data from the MySQL Database in Table format
To fetch data from the database in PHP to display in a table format, you can use HTML tags inside PHP with an echo statement. Because PHP is a loosely typed language and works perfectly with HTML but make sure to not change the file extensions.
The table format is another way to display MySQL Table data in PHP. HTML tables are extremely helpful in showing big database records in a more readable form. You can use all the HTML table tags with an echo statement in PHP.
It’s very simple, you do this as I did, just see the code below.
→ php code
<?php
while($row = mysqli_fetch_assoc($result)){
			// to show data in table format > do this
           echo '<tr > <th> Id: </th> <td>' . $row["id"] . '</td>
           <th> Name: </th> <td>' . $row["name_fld"] . '</td>
           <th> Email: </th> <td> ' . $row["email_fld"] . '</td>
           <th> Message: </th> <td>' . $row["msg_fld"] . '</td> </tr>';
       }
?>
In the above code, I used HTML table tags inside echo statements to convert database records into a table format.
Not only this, I enclosed the whole PHP code inside the HTML body. And then I used <style> tags to style the table. You can see the below code.
Below is the complete code for ‘Output Records from the Database in Table Format’:
→ complete code in one file – index.php
<!DOCTYPE html>
<html lang="en">
<head>
    <meta charset="UTF-8">
    <meta http-equiv="X-UA-Compatible" content="IE=edge">
    <meta name="viewport" content="width=device-width, initial-scale=1.0">
    <title>Database Records</title>
    <style>
        table{
            width: 70%;
            margin: auto;
            font-family: Arial, Helvetica, sans-serif;
        }
        table, tr, th, td{
            border: 1px solid #d4d4d4;
            border-collapse: collapse;
            padding: 12px;
        }
        th, td{
            text-align: left;
            vertical-align: top;
        }
        tr:nth-child(even){
            background-color: #e7e9eb;
        }
    </style>
<body>

<?php
    //storing database details in variables.
    $hostname = "localhost";
    $username = "webcodzingdb_user";
    $password = "webcodzing123";
    $dbname = "webcodzing_db";

    //creating connection to database
    $con = mysqli_connect($hostname, $username, $password, $dbname);
    //checking if connection is working or not
    if(!$con)
    {
        die("Connection failed!" . mysqli_connect_error());
    }
    else
    {
        echo "Successfully Connected! <br>";
    }
    //Output Form Entries from the Database
    $sql = "SELECT id, name_fld, email_fld, msg_fld FROM contactform_entries";
    //fire query
    $result = mysqli_query($con, $sql);
    if(mysqli_num_rows($result) > 0)
    {
       echo '<table> <tr> <th> Id </th> <th> Name </th> <th> Email </th> <th> Message </th> </tr>';
       while($row = mysqli_fetch_assoc($result)){
         // to output mysql data in HTML table format
           echo '<tr > <td>' . $row["id"] . '</td>
           <td>' . $row["name_fld"] . '</td>
           <td> ' . $row["email_fld"] . '</td>
           <td>' . $row["msg_fld"] . '</td> </tr>';
       }
       echo '</table>';
    }
    else
    {
        echo "0 results";
    }
    // closing connection
    mysqli_close($con);

?>
</body>
</html>
You can copy the above code entirely and paste it inside the display.php file to run it.
In your browser, the result will look something like this below:
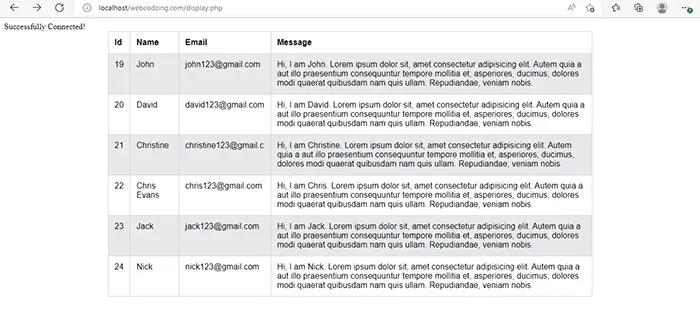
It is not so modern table. But by using CSS, you can format this table elegantly according to your needs. Showing how to do it was my responsibility.
Now, you know how to display MySQL table data from the Database in PHP. Hope this guide will be helpful to you.
If you have any questions related to this tutorial then you can feel free to ask in the comment section below.
Help others by sharing this tutorial!
