How to Add Image in Table Cell HTML

Are you finding a way to add an image in an HTML table cell? Images are very useful to create a visual representation of data in a table. And this tutorial will show you how to add images in table cells using HTML.
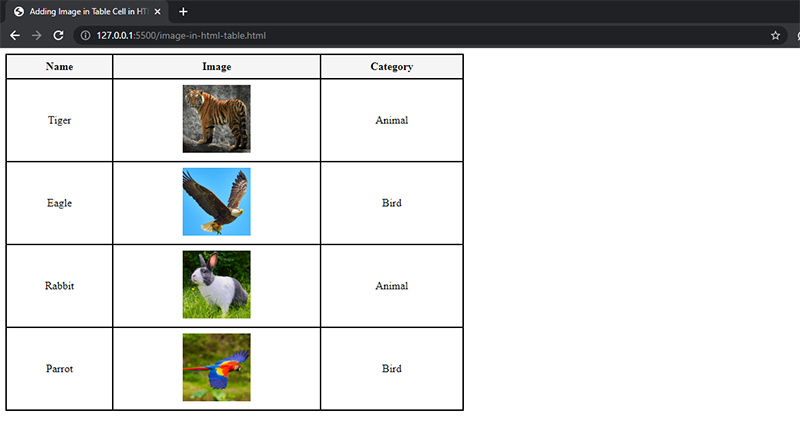
The HTML table with images that we’re going to create in this tutorial will look something like this below at the end.
Let’s see how I did this.
Adding Image in HTML Table Cell
The <img> tag is used inside the pair of <td> tags to display an image inside a table cell in HTML. And inside the <img> tag, we use the src attribute to specify the image path where the image is located on the system. And also the alt attribute, which displays text in the browser if the image is not found in the specified path.
The basic Syntax to add an image in an HTML table cell is shown below:
<td> <img src="image.jpg" alt="image_text"> </td>
Don’t forget to replace image.jpg with your real image name in file format. Plus, .jpg is the image file format that is crucial to specify. You can check your image file format in the properties of your image.
Also, for more information about this, you can check out this tutorial about how to add images in HTML from the folder.
The below HTML table code will add 4 images in the second column cells. And the table consists of 5 rows and 3 columns.
<!-- Table with Images -->
<table width="50%">
    <tr>
        <th>Name</th>
        <th>Image</th>
        <th>Category</th>
    </tr>
    <tr>
        <td>Tiger</td>
        <td><img src="tiger.jpg" alt="Tiger" width="100px"></td>
        <td>Animal</td>
    </tr>
    <tr>
        <td>Eagle</td>
        <td><img src="eagle.jpg" alt="Tiger" width="100px"></td>
        <td>Bird</td>
    </tr>
    <tr>
        <td>Rabbit</td>
        <td><img src="rabbit.jpg" alt="Tiger" width="100px"></td>
        <td>Animal</td>
    </tr>
    <tr>
        <td>Parrot</td>
        <td><img src="parrot.jpg" alt="Tiger" width="100px"></td>
        <td>Bird</td>
    </tr>
</table>
HTML Code Explanation:
- The <table> tags are used to specify a table in HTML.
- The <tr> tags define rows and <td> tags specify each cell in the HTML table row.
- In the second <td> element of each row, I used the <img> tag to insert the image in a table cell. Inside the <img> tag, I also used the HTML width attribute to fit an image in a table cell in HTML. The images I embedded in table cells were 600px by 600px in size, so I changed them to 100px wide using the width attribute.
Tip: If you don’t know how to create a table in HTML, then you can check out this detailed tutorial about HTML tables with examples.
You can copy and paste the above HTML code into your text editor and run it in your browser. The code output will look like this below.
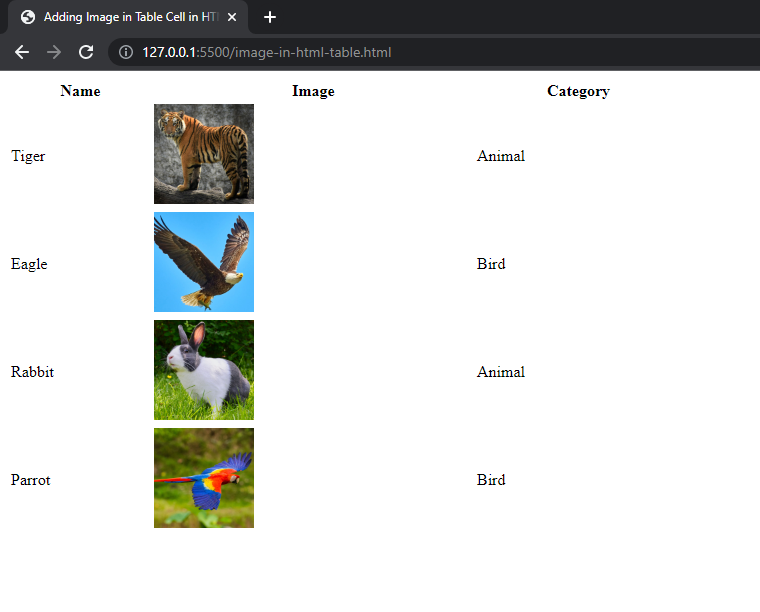
The above output is very simple and doesn’t have any styling like borders, padding, and spacing. Let’s add some CSS.
CSS to Style Table
<style>
    table, tr, th, td{
        border: 2px solid black;
        border-collapse: collapse;
        padding: 8px;
        text-align: center;
    }
    th{
        background-color: #f5f5f5;
    }
</style>
CSS Code Explanation:
- I used table, tr, td, and th element selectors to access these elements in CSS to add some styles to the table.
- Then, I specified the shorthand border property and set its values to give our table a border of 2 pixels, solid weight, and black color.
- The border-collapse property is used to collapse the borders while the text-align property aligns the content of the cells in the center of the HTML table.
- The padding property specifies 8 pixels of spacing around the cell’s content like text and images.
- Last of all, I used the background-color property to set it to gray for the table header which is <th> elements.
Here below is the output of the HTML table with images.
Best Practices to Add Images in HTML Table
Here are a few points to remember when adding an image to the HTML table.
- First of all, use optimized images to prevent HTML pages from slow loading. The image you’re going to use might be high in size, so you have to check the size and reduce the size of images using an online tool like TinyPNG that compresses image sizes without affecting the image quality. The ideal size for images is less than 200 Kb.
- Also, crop your image to the required cell size. For example, in the above code, I used 100px wide images in table cells and the real image sizes were 600px by 600px in width and height. So, it’s better to crop the images before using them. You can use Photoshop to crop your images.
That’s all. Now, you know how to add images in HTML table cells.
If you have any questions related to this tutorial, then ask in the comments section below.
Plus, don’t forget to share this tutorial to help others!
