How to Create a Contact Form in HTML
A contact form is an essential component of any website that enables users to communicate with the website owners or administrators. Without a contact form, any website is incomplete. In this tutorial, we’ll see how to create a simple contact form in HTML and CSS.
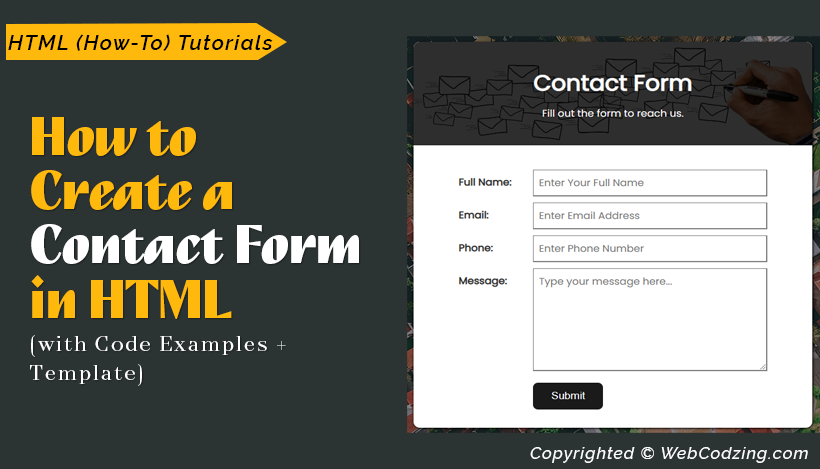
By the way, the HTML contact form that we’re going to create in this guide will look like this as shown below in the image.
You’ll also see free HTML contact form code examples with explanations. And we also have the download link of the contact form HTML template provided at the end of this tutorial. So, Let’s begin.
As we were talking about a contact form, let’s see first what it is and how an HTML contact form works.
What is an HTML Contact Form?
Contact form in HTML is a form that includes fields for the user to input their name, email address, phone number, and message. There are also many other input fields in HTML that you can use but these are the most common fields of HTML contact forms.
The main purpose of the contact form is to provide a convenient way for website visitors to contact the website owners.
When a user fills out the input fields and clicks the submit button then the form automatically sends an email to the website owner. However, this tutorial is for beginners and is more focused on creating a simple contact form using HTML and CSS.
If you’re not a beginner and already know how to create a contact form in HTML. And you’re interested in making a fully functional contact form that stores data in the database. Then, check out this guide about how to connect HTML form to MySQL database using PHP.
Now, let’s see the main part of this tutorial.
How to Create a Contact Form in HTML and CSS
Step 1: Open Your Text Editor
A text editor or code editor is where you will write the HTML code to create a contact form. There are 5 best text editors from which you can choose. For this tutorial, I will use visual studio code. After opening your text editor go ahead to the next step.
Step 2: Create a form.html file in your text editor
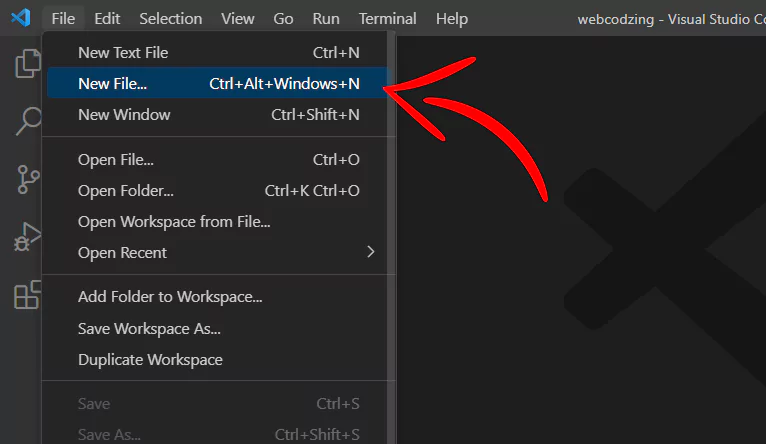
In the form.html file, we will write and save our HTML form code. To create form.html, inside the visual studio, go to the file option and click ‘New File’ to create a new file as shown below.
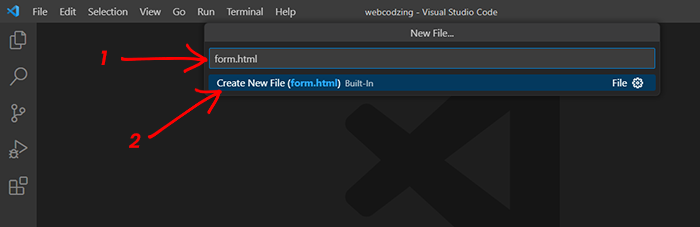
Type form.html in the search bar and click ‘Create New File’ as shown below.
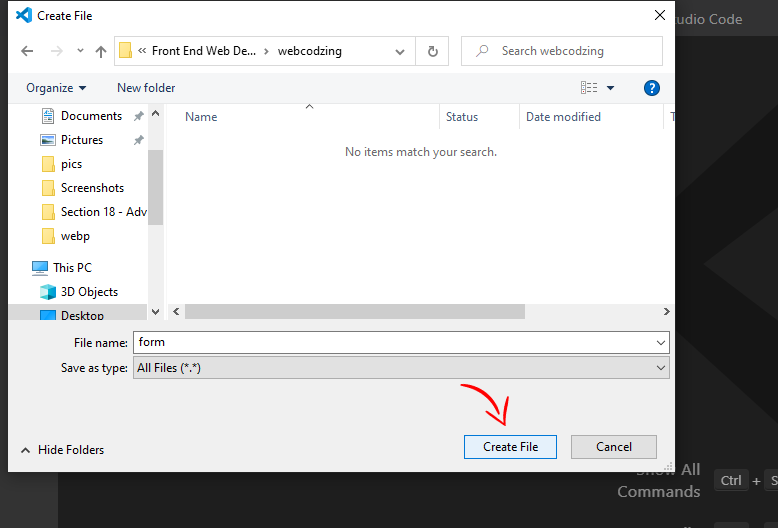
Now, click the ‘Create File’ button as shown below. Make sure you created and selected a folder where the code files will save.
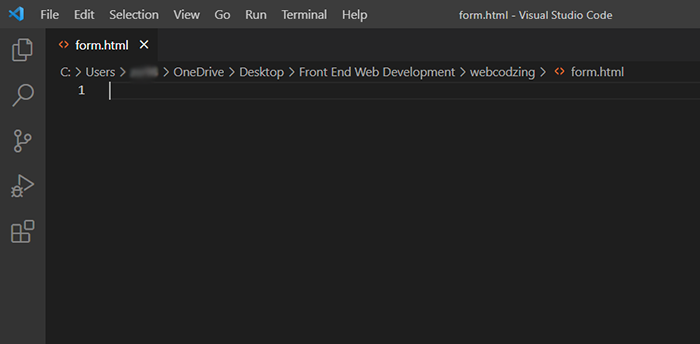
Now, the form.html have been created and we’re ready to code.
Let’s see the next step.
Step 3: Add HTML Contact Form Code
Here below is the complete code to create a contact form in HTML.
<!DOCTYPE html>
<html lang="en">
<head>
    <meta charset="UTF-8">
    <meta http-equiv="X-UA-Compatible" content="IE=edge">
    <meta name="viewport" content="width=device-width, initial-scale=1.0">
    <title>HTML Contact Form</title>
    <link rel="stylesheet" href="style.css">
</head>
<body>
    <!-- HTML Contact Form -->
    <div class="contact-form">
        <div class="form-background">
            <div class="form">
                <div class="form-header">
                    <div class="b-overlay">
                        <div class="form-header-content">
                            <h2>Contact Form</h2>
                            <p>Fill out the form to reach us.</p>
                        </div>
                    </div>
                </div>
                <div class="form-container">
                    <form action="index.php" method="POST">
                        <div class="col1">
                            <div class="row row1"><label for="name">Full Name:</label></div>
                        </div>
                        <div class="col2">
                            <div class="row row2"><input type="text" placeholder="Enter Your Full Name"></div>
                        </div>
                        <div class="col1">
                            <div class="row row1"><label for="email">Email:</label></div>
                        </div>
                        <div class="col2">
                            <div class="row row2"><input type="email" placeholder="Enter Email Address"></div>
                        </div>
                        <div class="col1">
                            <div class="row row1"><label for="number">Phone:</label></div>
                        </div>
                        <div class="col2">
                            <div class="row row2"><input type="text" placeholder="Enter Phone Number"></div>
                        </div>
                        <div class="col1">
                            <div class="row row1"><label for="message">Message:</label></div>
                        </div>
                        <div class="col2">
                            <div class="row row2"><textarea name="" id="" cols="30" rows="6" placeholder="Type your message here..."></textarea></div>
                            <div class="sb-button">
                                <input type="submit">
                            </div>
                        </div>
                    </form>
                </div>
            </div>
        </div>
    </div>
</body>
</html>
It’s better to copy and paste the above code into your form.html file and save it. Then, let’s understand the HTML contact form code step by step.
HTML Form Code Explanation:
Our HTML form code starts from the comment as shown below.
<!-- HTML Contact Form -->
    <div class="contact-form">
        <div class="form-background">
            <div class="form">
                <div class="form-header">
                    <div class="b-overlay">
                        <div class="form-header-content">
                            <h2>Contact Form</h2>
                            <p>Fill out the form to reach us.</p>
                        </div>
                    </div>
                </div>
                <div class="form-container">
                    <form action="index.php" method="POST">
                        <div class="col1">
                            <div class="row row1"><label for="name">Full Name:</label></div>
                        </div>
                        <div class="col2">
                            <div class="row row2"><input type="text" placeholder="Enter Your Full Name"></div>
                        </div>
                        <div class="col1">
                            <div class="row row1"><label for="email">Email:</label></div>
                        </div>
                        <div class="col2">
                            <div class="row row2"><input type="email" placeholder="Enter Email Address"></div>
                        </div>
                        <div class="col1">
                            <div class="row row1"><label for="number">Phone:</label></div>
                        </div>
                        <div class="col2">
                            <div class="row row2"><input type="text" placeholder="Enter Phone Number"></div>
                        </div>
                        <div class="col1">
                            <div class="row row1"><label for="message">Message:</label></div>
                        </div>
                        <div class="col2">
                            <div class="row row2"><textarea name="" id="" cols="30" rows="6" placeholder="Type your message here..."></textarea></div>
                            <div class="sb-button">
                                <input type="submit">
                            </div>
                        </div>
                    </form>
                </div>
            </div>
        </div>
    </div>
<!-- Contact Form End -->
The above HTML contact form code contains 4 input fields and a form submit button. The form inputs will allow the user to fill in their detail and a text area will allow them to write their message. The submit button is used to submit the form entries.
The input fields and form submit button code looks like this below.
<form action="index.php" method="POST">
   <input type="text" name="fname" placeholder="Enter Your Full Name">
   <input type="email" name="email" placeholder="Enter Email Address">
   <input type="text" name="number" placeholder="Enter Phone Number">
   <textarea name="message" id="" cols="30" rows="6" placeholder="Type your message here..."></textarea>
   <input type="submit" name="submit">
</form>
If you see the above code, our form inputs and submit button are enclosed in <form> tags. The <form> tag is crucial and in the starting <form> tag we specify the form submission method and the path which is typically a PHP file where the form data is processed after submission.
You will see more explanation about the form inputs later in this tutorial. Let’s go ahead to the next step.
Step 4: Add CSS Code to Style Your Contact Form
The below CSS code will change the look and feel of your HTML contact form and make it beautiful.
*{
    box-sizing: border-box;
    margin: 0;
}

@font-face {
    font-family: 'Poppins';
    src: url('webfonts/Poppins-Regular.ttf');
}

body{
    font-size: 16px;
    font-family: 'Poppins';
}

/* Contact Form */
.contact-form{
    width: 100%;
    overflow: auto;
    background-image: url('background.jpg');
}

.contact-form .form-background{
    background-color: rgba(0, 0, 0, 0.451);
    overflow: hidden;
}

.form{
    width: 46%;
    overflow: auto;
    margin: auto;
    margin-top: 20px;
    margin-bottom: 20px;
    box-shadow: 1px 1px 4px 0.1px;
    padding-bottom: 30px;
    background-color: #ffffff;
    border-radius: 10px;
}

.form .form-header{
    text-align: center;
    background-image: url('header-image.jpg');
    background-repeat: no-repeat;
    background-position: center;
    background-size: cover;
}

.form .form-header .b-overlay{
    background-color: #000000d1;
    padding: 40px 140px;
    color: #ffffff;
}

.form-header-content h2{
    font-size: 36px;
    font-weight: bold;
}

.form-header-content p{
    margin-top: 10px;
}

.form .form-container{
    padding: 30px 70px;
}

.form-container form input[type=text], input[type=email], textarea{
    font-size: 16px;
    width: 100%;
    border: 1px solid gray;
    border-right: 2px solid gray;
    border-bottom: 2px solid gray;
    color: gray;
    padding: 8px 8px;
    font-family: 'poppins';
}

input:focus, textarea:focus{
    outline: none;
    border-bottom-color: #0E8388 !important;
}

.form-container .col1{
    width: 20%;
    float: left;
}

.form-container .col2{
    width: 80%;
    float: left;
    padding-left: 20px;
}

.form-container .row{
    margin-top: 10px;
    color: gray;
}

.row label{
    text-align: right;
    position: relative;
    top: 8px;
    font-weight: bold;
    color: #333333;
}

.sb-button input{
    margin-top: 12px;
    border-radius: 8px;
    font-size: 17px;
    background-color: #1a1a1a;
    color: #ffffff;
    border: none;
    padding: 12px 28px;
    cursor: pointer;
}
The CSS code of the contact form has some background images and a web font which is included in the template file of the form that you can download from the link given at the end of this tutorial.
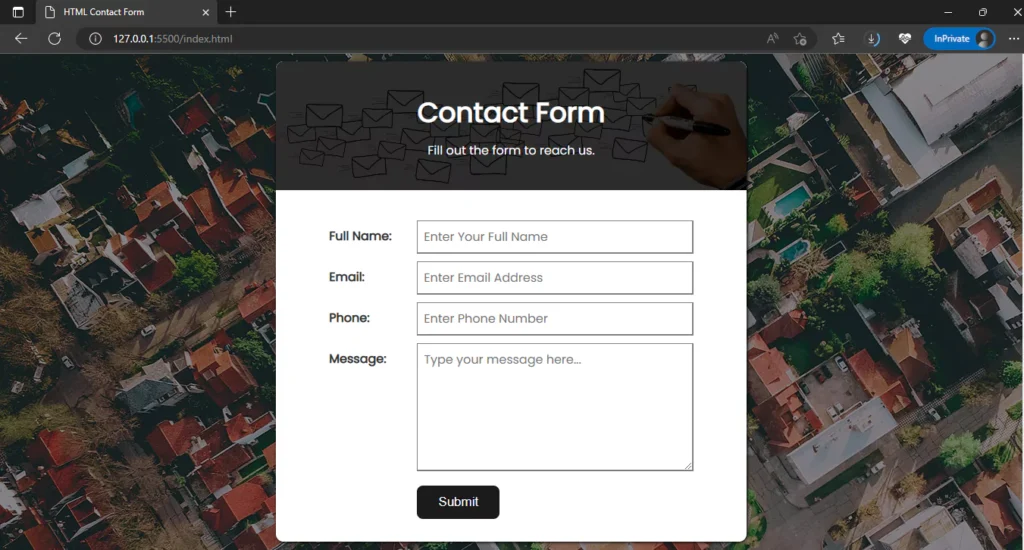
All you have to do is just create a new file with the name ‘style.css’ and copy-paste the code given above then save it. And your contact form in HTML will automatically design and look like this as shown below.
Download HTML Contact Form Template
The template file contains all the code, images, and web fonts. All you have to do is download the file and unzip it and then open the form.html file in your browser.
In HTML, we use a pair of <form> tags to create a form. And inside these tags, we use <input> tags to specify the input fields for the user. These input fields have different types and to specify those types we use the type attribute inside the form <input> tag.
Let’s see the different input types for HTML forms.
Form Input Types and Their Functions
The following are a few different <input> types that you can use:
- <input type=”text”>
We use this input to get the text input from the visitor. The text is simple in characters and you can also limit the characters for this input.
- <input type=”email”>
To get the email of the visitor we use type email.
- <input type=”radio”>
We use it to specify radio buttons in the form which give an option to the visitor the to choose from the options. For example gender: male or female.
- <input type=”date”>
The data type of the attribute is for getting the date of birth of the visitor.
- <input type=”file”>
This input field allows the users to upload a file. It simply creates a button that allows the user to select the file from their system to upload. However, it does select the file from the system. But it does not upload the file without PHP code.
Here is the guide on how to upload an image file and store it in a folder using PHP.
- <input type=”submit”>
This input simply creates a button to submit the form entries.
- <input type=”password”>
This input type allows the visitor to enter the password if they want to create an account.
- <input type=”url”>
If you want to get the website URL of the visitor then you can use the input type URL.
The main difference between all these input types is their appearance. You can get different benefits and use these inputs according to your needs.
Furthermore, there are many other form input types you can see all of them in the following guide about HTML form input types.
Summary
In this tutorial, we learned to create a simple contact form in HTML and added some CSS code to style it and make it look professional. And we saw the form inputs and their functions with code explanations. And we added a download link for the form.
So, this is how you can create a contact form in HTML. If you have any questions related to this tutorial then feel free to ask in the comments section below.
Related Tutorial:
Don’t forget to share this tutorial with your friends!
