HTML Forms

This tutorial will teach you everything you need to know about HTML forms as a beginner.
What is an HTML Form?
An HTML form is the most essential component of any website or web application. The main purpose of HTML forms is to collect the input of the users. The user input can be any information like contact information, a message, feedback, survey information, account creation information like username and password, and so on. The HTML forms collect the information and send it to a PHP file handler that processes and saves it.
However, the main focus of this tutorial is to teach you how an HTML form is made, how it works, what are tags used for the HTML form, what are inputs, and how many types of inputs we have in HTML to work with forms.
Creating HTML Form
Here below is the structure of the HTML form that we’re going to understand.
<form action="" method="post">
    <label for="name">Name</label><br>
    <input type="text"><br>

    <label for="email">Email</label><br>
    <input type="email"><br>

    <label for="age">Age</label><br>
    <input type="number"><br>

    <label for="country">Country</label><br>
    <select id="country" name="country">
        <option value="United States">United States</option>
        <option value="India">India</option>
        <option value="uae">United Arab Emirates</option>
        <option value="Canada">Canada</option>
    </select><br>

    <label for="gender">Gender</label>
    <input type="radio"> Male
    <input type="radio"> Female
    <br>

    <label for="message">Message</label><br>
    <textarea name="msg" id="message" cols="30" rows="10"></textarea><br>

    <input type="submit">
</form>
Let’s break down everything one by one.
HTML <form> element
In HTML, the form is created through a pair of <form> tags as shown below.
<form>
<!-- Everything like input tags goes inside this -->
</form>
Form action and method Attributes
Inside the opening <form> tag there is an attribute called action and form method.
<form action="/form-handler.php" method="post">
<!-- Everything like input tags goes inside this -->
</form>
The HTML form’s action attribute is used to specify the path where the form input data will go after clicking on submit button. Which is a php file that processes it. But for now, we’re focusing on HTML, not PHP but if you want you can still check our tutorial about how to connect html form to MySQL database using PHP.
The HTML form’s method attribute specifies, through which method an HTML form should be submitted. There are only two methods GET and POST.
- The GET method is not so secure. We use it mostly to send queries in a URL.
- While the POST method is secure.
The Form <label> element
The <label> tags are used to define the labels from each input field. It’s not necessary but it’s a good practice to make your code understandable.
<form action="/form-handler.php" method="post">
    <label for="name">Name:</label>
</form>
Inside the <label> tag we use for, an attribute that specifies the purpose of the label. For example, if it’s for the name field you can give it a name or first name it’s up to you what you give value.
The benefit of specifying for attribute is that if you give the same value to the id attribute for the input field then it will get focused on clicking on the label text.
<form action="/form-handler.php" method="post">
    <label for="fname">First Name:</label>
    <input type="text" id="fname">

    <br><br>

    <label for="lname">Last Name:</label>
    <input type="text">
</form>
In the above code, there are two input fields one is with the id attribute specified, and the other is without the id attribute. Let’s see the difference in the output below.
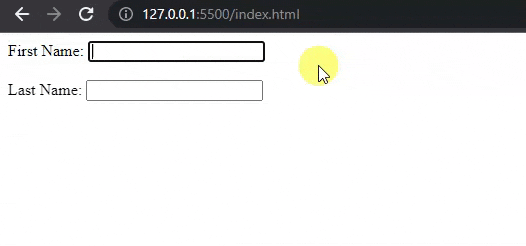
As you noticed in the above image when I click on the first name the input field gets focused but when I click on the last name it does not focus. It is because the id attribute is not specified and if we specify it the value of the id attribute should be the same as for the attribute to connect label with the input field.
HTML Form <input> element
To create an input field we use the <input> element inside the HTML <form> tags. The look and functioning of <input> element depend on the type attribute.
The following HTML form code will create a text input field.
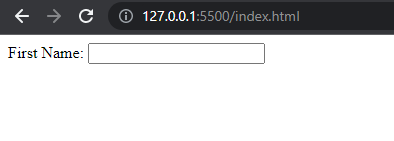
<form action="/form-handler.php" method="post">
    <label for="fname">First Name:</label>
    <!-- Text Input Field -->
    <input type="text" id="fname">
</form>
In the above code, I used <input> element and specify type=”text” to create a text input field.
When you will see the input in your browser it will look like this below.
We have many other input types, let’s see them.
Form Input Types
To collect the input of the users, HTML gives us many input types to collect different types of input. Each input is specified using a type attribute. The types of input such as text, email, number, color, date, and more.
Below are the 10 HTML form input types that we use mostly.
| Input Type | What does it do? |
|---|---|
| <input type=”text”> | Display a single-line text field in the browser. |
| <input type=”password”> | Display a password input field. |
| <input type=”submit”> | It displays a form submit button. |
| <input type=”color”> | Shows a color picker. |
| <input type=”number”> | Shows a number input field. |
| <input type=”radio”> | Display radio buttons. |
| <input type=”email”> | Shows an email input field. |
| <input type=”file”> | Display a file upload button. |
| <input type=”range”> | Displays range slider. |
| <input type=”reset”> | Shows a form reset button that removes everything. |
Below is an HTML form code example with a few input types.
<form action="" method="post">
    <label for="name">Name</label><br>
    <input type="text"><br>

    <label for="email">Email</label><br>
    <input type="email"><br>

    <label for="age">Age</label><br>
    <input type="number"><br>

    <label for="country">Country</label><br>
    <select id="country" name="country">
        <option value="United States">United States</option>
        <option value="India">India</option>
        <option value="uae">United Arab Emirates</option>
        <option value="Canada">Canada</option>
    </select><br>

    <label for="gender">Gender</label>
    <input type="radio"> Male
    <input type="radio"> Female
    <br>

    <label for="message">Message</label><br>
    <textarea name="msg" id="message" cols="30" rows="10"></textarea><br>

    <input type="submit">
</form>
The output of this form will look like this below:
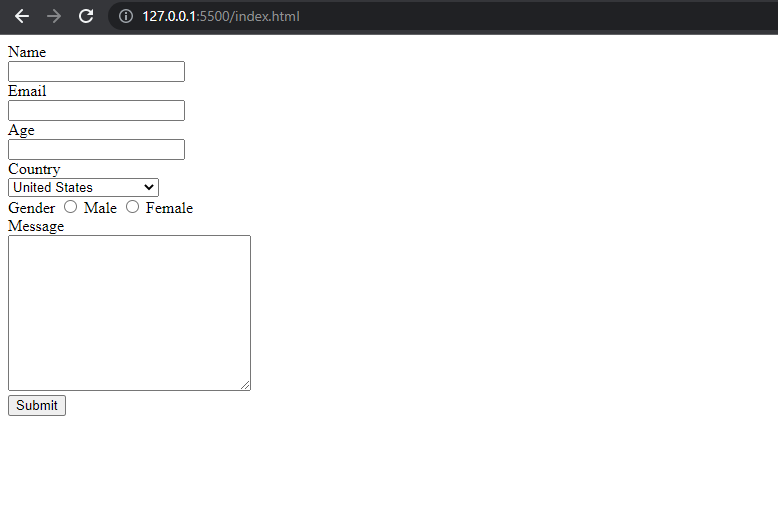
The above HTML form has not had any styling or design. But if you want to make this HTML form look more beautiful using CSS. Then, check our CSS forms tutorial.
Form <textarea> element
The <textarea> element is used to create a multi-line text input field. We mostly use this to collect comments, messages, and reviews from our site visitors. Also, we use rows and cols attributes to define the size of the text area.
The syntax is simple and shown below:
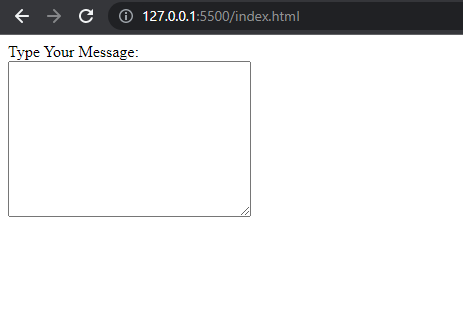
<form action="" method="post">

    <label for="msg">Type Your Message:</label><br>
    <textarea id="msg" cols="30" rows="10"></textarea>

</form>
In the above code, I also used the id attribute to link the text with the label using the same value as in for attribute.
Code Output:
Form Submit Button
The <input type=”submit”> is used to create a form submit button.
The below HTML forms code will create a textarea field and a submit button.
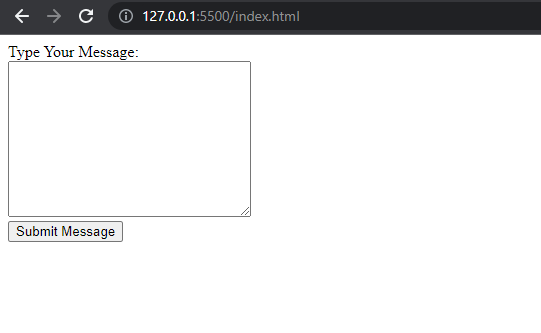
<form action="" method="post">

    <label for="msg">Type Your Message:</label><br>
    <textarea id="msg" cols="30" rows="10"></textarea><br>

    <input type="submit" value="Submit Message">

</form>
The text that is displayed in the submit button can be changed using a value attribute.
The output will look like this in your browser.
Lastly, HTML Forms take the user’s input and process it when a user clicks on the form submission button. How do they process the input after submitting it? For this, you can go and see our tutorial about how to connect HTML form with a database using PHP. PHP is the language that we use to process the form input data and save it in the database or wherever we want. It also depends on what you want to do with the form information, you can also send it as an email.
That’s all. Now, you know much about HTML forms. If you have questions related to this tutorial then leave them in the comment section below.
Related Tutorial:
