How to Add WordPress Website to Google Search Console
Do you want to add your WordPress website to Google Search Console? Don’t worry, this guide will provide you with all the information you need. In this guide, you will learn all the important things about Google Search Console to get started.
Adding your brand new website to Google Search Console, mean you want your website to show in Google search results. Adding a WordPress website to Google Search Console is the most important thing to optimize your website for Google.
I divided this guide into different steps. So you can easily understand it.
By clicking on the links below, you can jump on that particular step.
- What is Google Search Console?
- Benefits of using Google Search Console
- How to Add WordPress Website to Google Search Console
- Verify your WordPress Website in Google Search Console
- Submit Your Sitemap in Google Search Console
- And Done!
So first of all, let’s see a quick introduction.
What is Google Search Console?
Google Search Console is a free web service for web developers offered by Google. It allows website owners to track their website’s presence in Google search results. We can do a lot of things such as submitting new content and tracking the position of that content etc.
Benefits of Using Google Search Console
It’s not just a tool for optimizing your website for SEO. It has many benefits.
Google Search Console provides us with a lot of useful features like
- checking indexing status
- you can check if your website is mobile-friendly or not.
- how many clicks your website is getting on a daily basis
- you can check your ranked articles’ positions in google search results
- optimize for SEO
- you can check organically ranked keywords
- website’s performance
- you can fix issues
- and do a lot more
You can do a lot of cool things to optimize your website ranking on Google.
Now, I am going to show you an easy way to add your WordPress website to Google Search Console. So, let’s get started.
Add Your WordPress Website to Google Search Console
- First of all, go to the Google Search Console website. Click to go to the website. Then, click on Start Now button.

After that sign in with your Google account.
2. Then, Click on Add Property. If you see a pop-up box then skip this step and go ahead to the next step.


Note: In Google Search Console, Property is your domain name (website’s URL). So, don’t be confused.
3. Here are two options to add a new property, as you can see in the image below. The first method is a Domain name and the second method is a URL prefix to add your WordPress website URL.

I always choose the URL prefix method to add my website URL in Google Search Console. The benefit of using a URL prefix is that it provides multiple verification methods. And it is the better and more flexible way. I will also recommend this to you.
In the URL prefix section, enter your website URL as it is.
Remember:
HTTP and HTTPS are not the same. Also, https://example.com and https://www.example.com are two different URLs and are not the same. So kindly, enter your website URL correctly. Then, click on the Continue button.
To find the correct site address (URL) of your WordPress website. Go to settings then general in your WordPress dashboard. And look at the Site Address (URL). The image below is clearly demonstrating this.
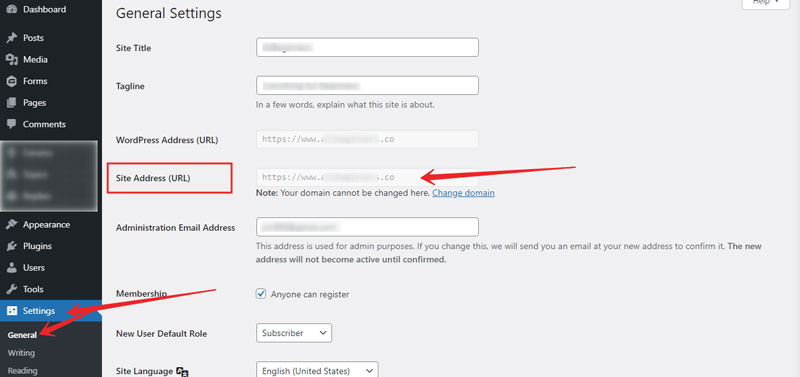
Note: I blurred my own website address (URL) in the above image. So, Let’s go ahead.
4. After adding your website’s address (URL). Your site will be automatically added. And after that, you need to verify your property to get started.
In case, if you have set up Google Analytics already
In case, if you have set up google analytics already then you will see a pop-up box that will show, your Ownership auto-verified through Google Analytics. This means you don’t need to verify your property because it has been verified already through Google Analytics. As you can see in the image below.
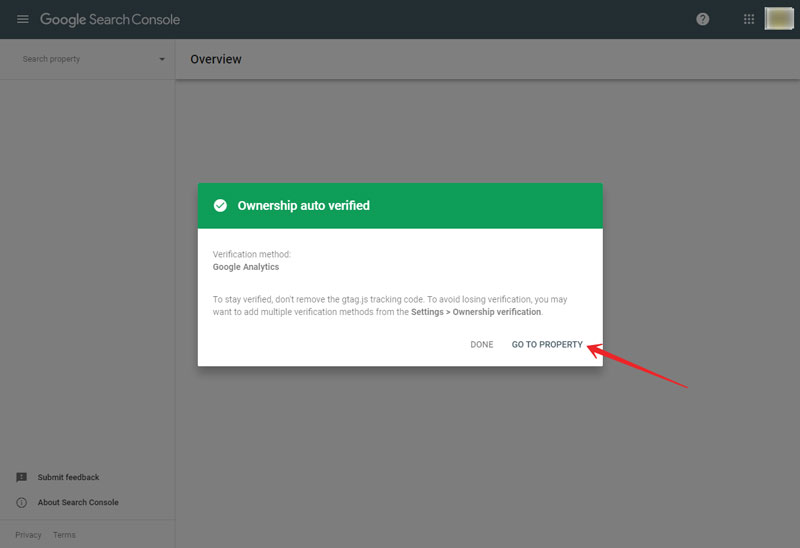
Just click on go to the property.
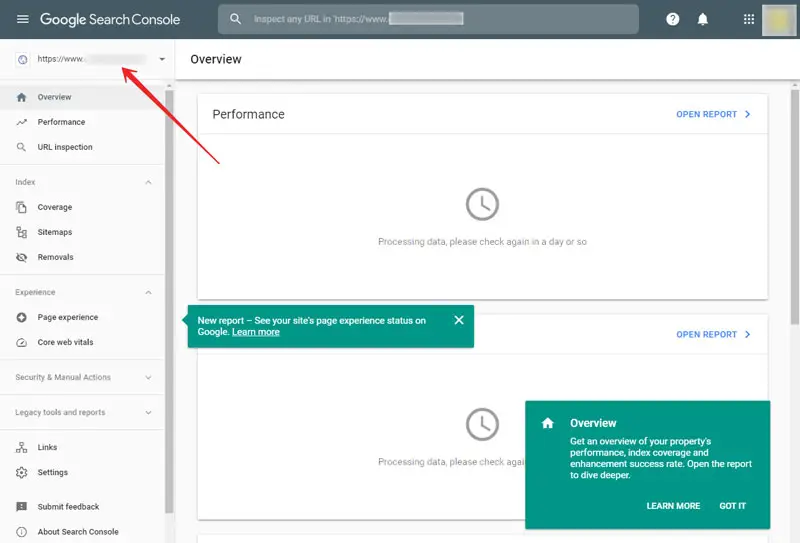
After clicking on, Go To Property. You will see your site address (URL) as shown in the image above.
Now go and submit the sitemap of your WordPress website to get started. But listen!
In case, if you have not added Google Analytics yet
If you have not added google analytics to your WordPress website yet. Then, that pop-up will not show and you have to do one step further. You still need to verify your property to get it started. There are four methods to verify a property.
Note: If you want to add Google Analytics to your WordPress website. Also, if you want to see how much Google Analytics is important for your website. Then, here is a complete guide on how to add analytics (GA4) to the WordPress website.
And if you don’t want to add google analytics to your WordPress website. Then, don’t worry there are four other methods to verify a property(your WordPress site address).
Verify Your WordPress Website in Google Search Console
Now, I am going to verify a WordPress website through an HTML meta tag. It is the easiest way to verify a WordPress website.
So, go ahead and verify your property (WordPress website) through the HTML meta tag method.
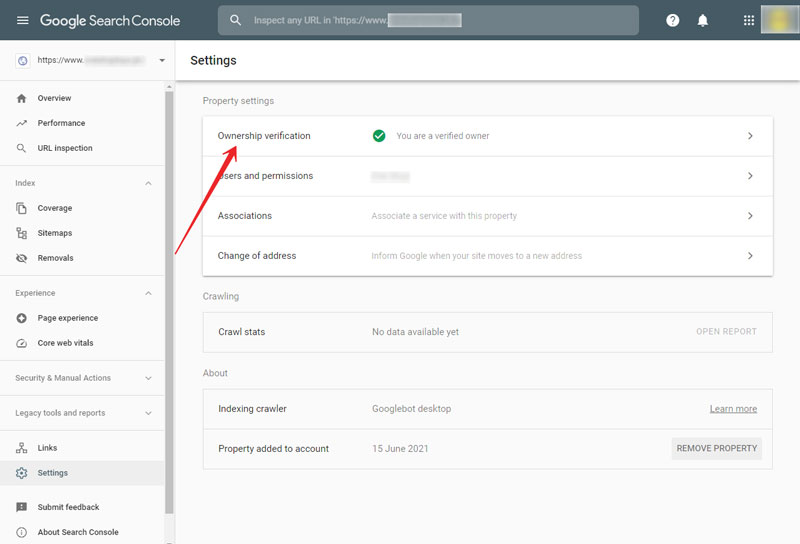
1. To do this, go to Settings. As shown in the image below.

After that, click on Ownership Verification.
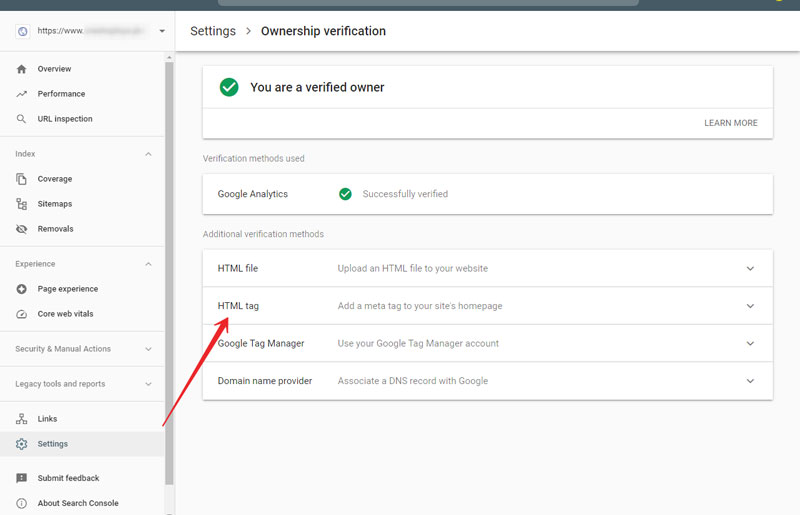
2. Nowhere, click on the HTML tag.
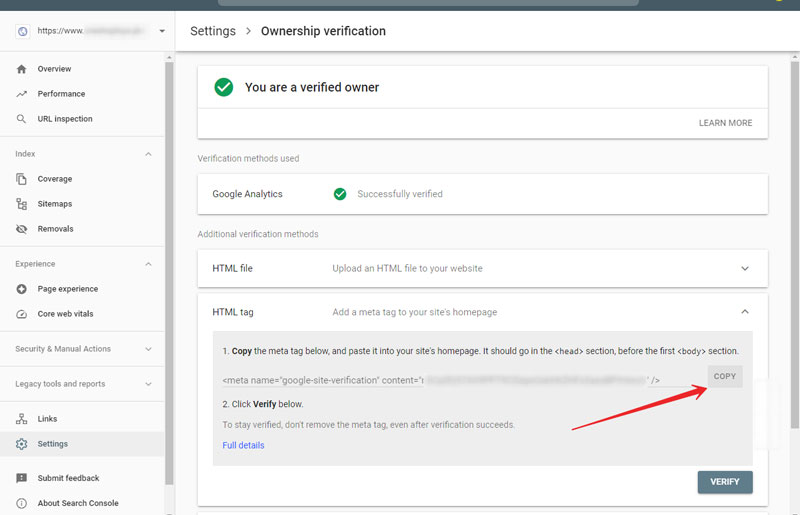
3. Now, you need to copy this HTML meta tag code to paste into your WordPress website. Click on the copy button, to copy the HTML meta tag.
4. Now, you need to paste this meta tag in between your website’s head tags. To do this, go and log in to your WordPress dashboard.
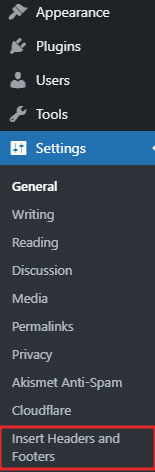
After that, add a new plugin called Insert Headers and Footers plugin in your WordPress.
After installing that plugin, go ahead and open that plugin. The plugin will be located in your settings area. As shown in the image below.
This plugin is used for inserting code directly in the WordPress website header and body tags. Without having any knowledge of code.
5. Now, paste that HTML meta tag code in the header section, as shown below in the image.
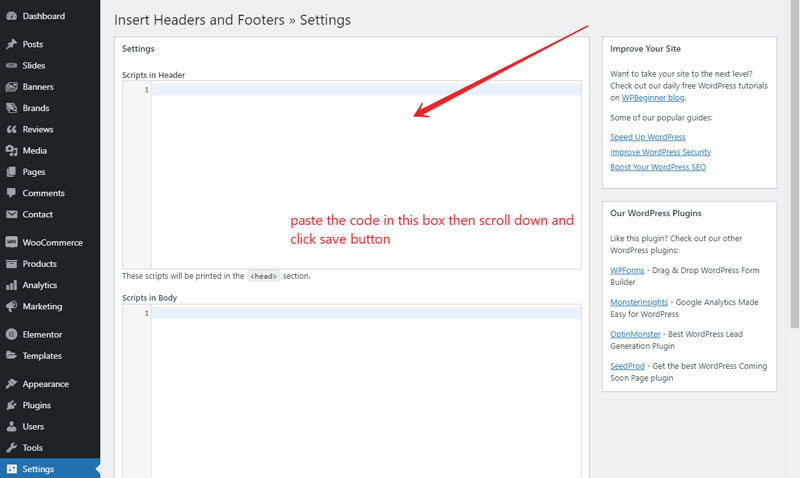
6. Don’t forget to save. After pasting the code, scroll down and click on the save button to save the code in your WordPress website.
Now, go to Search Console and click on verify to finish the verification.
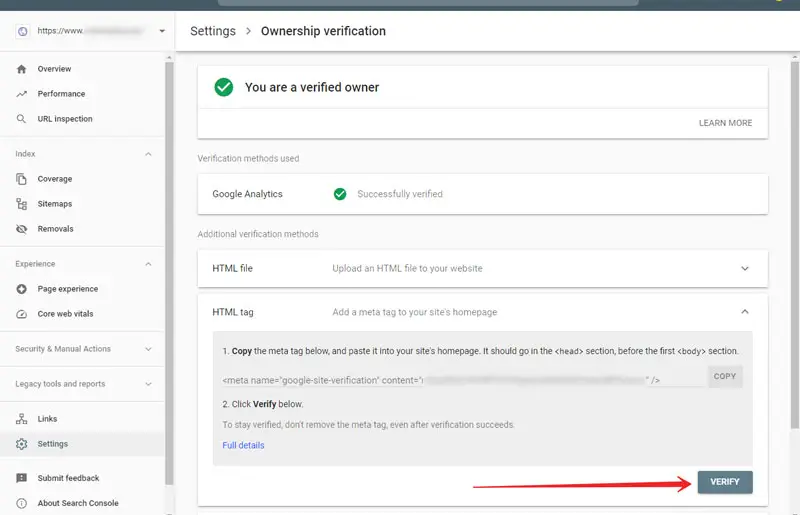
After that click, you will see your property has been verified. As shown in the image below.

Tip: If you’re using the Yoast SEO plugin
If you’re using Yoast SEO plugin then you can paste your HTML meta tag in the Yoast SEO plugin and it will automatically be verified. Just look at the image below to see where to paste the HTML meta tag.
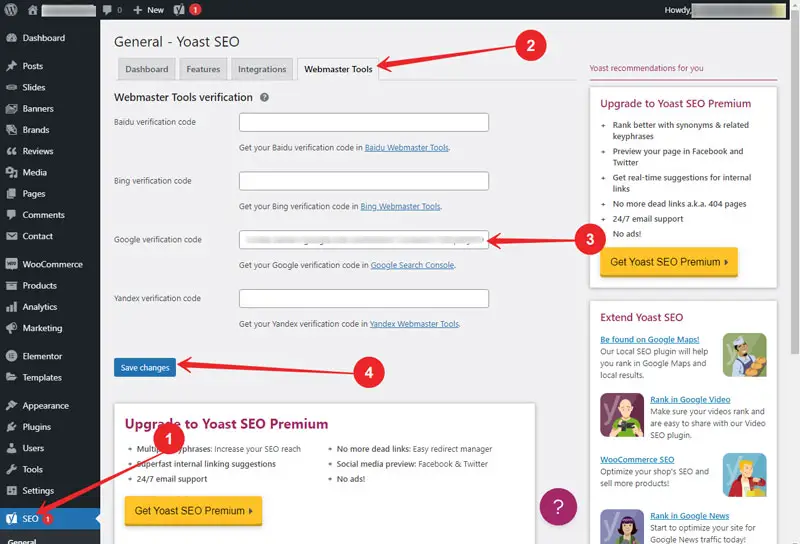
See the steps in the image above to paste your HTML meta tag in Yoast SEO. Listen, there is a Google verification code field where you will paste your HTML meta tag. It will automatically extract the Google verification code from the HTML meta tag. Don’t forget to click on save changes.
Now, everything is done except one thing. Just one thing remains. You will have to submit the sitemap of your WordPress website in Google Search Console and done! So, let’s go do it quickly. Just two steps.
Submit Your Sitemap in Google Search Console
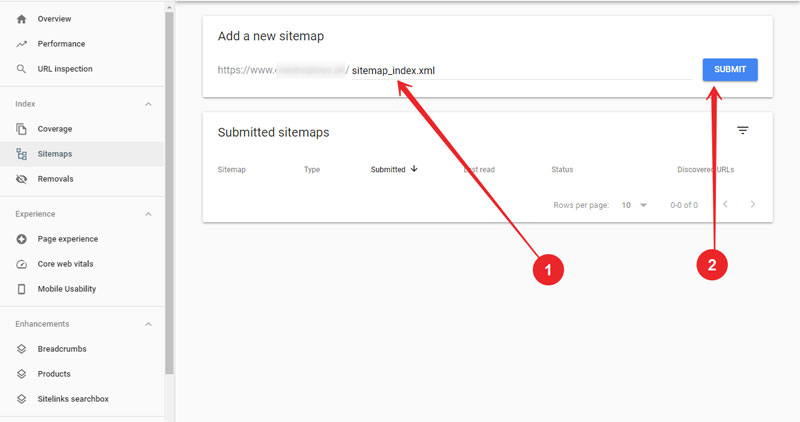
- To do this, go to the Index section in the search console and click on Sitemaps. As you can see in the image below.
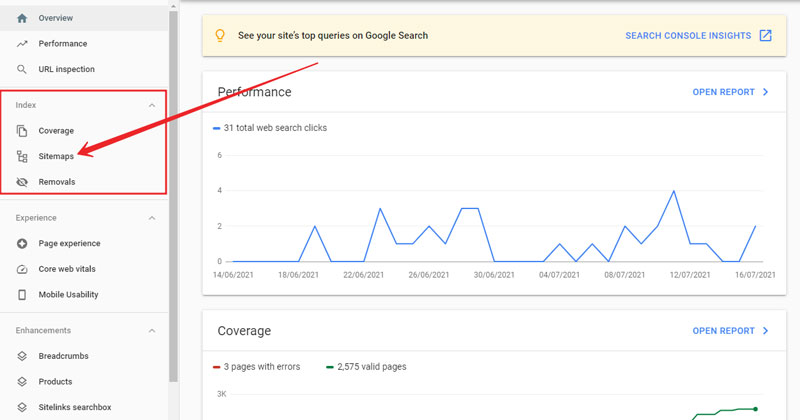
2. Nowhere, just type sitemap_index.xml next to your website URL as shown in the image below. And click on the Submit button.
Now, you have submitted the sitemap of your WordPress website. And, you have successfully added your WordPress website to Google Search Console. Congratulations!
No need to do anything. Just sit back and wait for a few days for Google bots to crawl and index your website completely. After a few days, Google will start showing your website, pages, and posts in search results. It may take some time depending on your website’s site or content quantity.
That’s all for now. I hope this guide will be very helpful for you. If you have any questions related to this article then don’t hesitate to ask those questions. Ask your questions in the comment section below. We will be glad to answer.
Topic: WordPress