Check if Element Exists using JavaScript (4 Methods)
There are multiple JavaScript methods to check if an element exists in an HTML document or not. This tutorial will show you all the methods step by step with code examples. So, let’s begin.
How to Check if Element Exists using JavaScript
In JavaScript, to check if an element exists or not in the HTML document, we use the following methods.
These methods take one argument in the form of a string which is the name, id, class, or CSS selector of the element. Then, based on that argument the method checks the existence of that element in the DOM. Then, the method returns a value that is null in case the element does not exist and if it exists then the method simply accesses that element from DOM. After specifying the element that we want to check for, we use an if-else conditional statement to show a message on the screen based on the returned value.
So, let’s see how to use each method to check if an element exists using JavaScript.
1- Use getElementById() Method
We use the JavaScript getElementById() method to access an HTML element by its defined id. This method takes one argument in the form of a string which is the text you specify as the id of an HTML element. After that, we use the JavaScript if-else statement to show a message base on the returned value. Let’s see how.
The following JavaScript code will find the element with the id="demo" by searching the whole HTML document and displaying output based on conditions if the element exists in the document or not.
<body>

    <h1 id="demo"></h1>
    <p id="para"></p>


<!-- JavaScript Code -->
<script>
    var element = document.getElementById('demo');

    if(element !== null){
        document.write('element exists!');
    }
    else{
        document.write('element does not exist!');
    }
</script>
</body>
Code Explanation:
- In the above code, first I created two HTML elements
<h1>and<p>, and assigned different id names. - Second, I use the JavaScript code and create a variable and name it an “element“. And in this variable, I stored the
document.getElementById('demo'). So that I can use this variable in the conditional statement to check if an element exists or not. - Then, by using an if-else statement I applied a condition
(element !== null)which means if the element does not equal to null then run the first block of code which outputs “Element exists!” otherwise run the second block of code which will output “Element does not exist!”. - Also, I used a document.write() method to print output on the screen. However, you can also create an alert using this code
window.alert('Element exists').
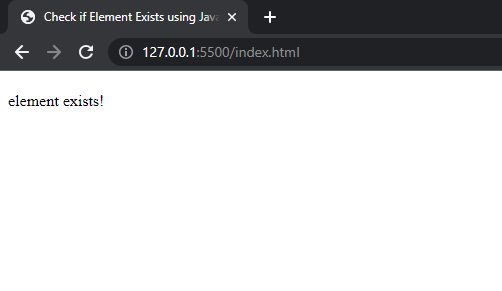
After running the code, you will see the output like this below. The output shows an element exists because we have an element named <h1> with the id=”demo” in our HTML document.
Also, if you remove this HTML code line <h1 id="demo"> </h1>, you will see the output will change and show “Element does not exist!”. This way you can check whether the code is working or not. Now, let’s see another method.
2- Use getElementsByTagName() Method
The getElmentsByTagName() method works in the same way as the getElementById(). The difference is, it takes the HTML tag name as an argument then it selects all the tags with the specified name present in the document whether it is only one tag or more than one. For example, if you give it ‘div’ then it will access all the div tags from the HTML DOM.
In the following code, I demonstrated how to check if an element exists using JavaScript getElementsByTagName() method.
<body>

    <h1></h1>
    <p></p>
    <p></p>
    <p></p>
    <p></p>

<!-- JavaScript Code -->
<script>
    // getting elements by the tag name
    var element = document.getElementsByTagName('p');

    if(element !== null){
        document.write('element exists!');
    }
    else{
        document.write('element does not exist!');
    }
</script>
</body>
However, if you don’t want to access all the tags then you can use another alternative to this method which is getElementsByClassName(). This method works best if you want to check specific elements.
3- Use the querySelector() Method to Check if an Element Exists
Another way to check if an element exists is by using JavaScript querySelector() method. This method allows us to select the elements of the HTML document using CSS selectors. It takes the element selector, id, or class selector as an argument and selects the first element from the HTML DOM.
The following code syntax will select the first p element from the HTML document using the CSS element selector.
document.querySelector('p');We are going to use the same method to check if an element exists in an HTML document or not. Let’s see the code below.
<body>

    <h1></h1>
    <p></p>
    <p></p>
    <p></p>
    <p></p>

<!-- JavaScript Code -->
<script>
    // getting element by it's CSS Selector
    var element = document.querySelector('p');

    if(element !== null){
        document.write('element exists!');
    }
    else{
        document.write('element does not exist!');
    }

</script>
</body>
In the above code, we have one h1 element and four p elements. The code will check the first p element using the element selector.
4- Use querySelectorAll() Method
The querySelectorAll() is the best alternative to the querySelector() method. This method access all the elements by its specified CSS selector. The following code will check the existence of all the p elements present in the document and access them.
<body>

    <h1></h1>
    <p></p>
    <p></p>
    <p></p>
    <p></p>

<!-- JavaScript Code -->
<script>
    // getting element by it's CSS Selector
    var element = document.querySelectorAll('p');

    if(element !== null){
        document.write('element exists!');
    }
    else{
        document.write('element does not exist!');
    }

</script>
</body>
That’s all. This is how you can check if an element exists using JavaScript. If you have any questions then feel free to ask in the comment section below.
And Help Others by Sharing This Tutorial!
Topic: JavaScript